You can buy all the fancy, expensive Dutch ovens in the world, but if you don’t understand the physics of moisture, you’re just heating up expensive ceramic. I spent my first decade in the village bakery watching young apprentices panic because their loaves were coming out with crusts as thick and dull as a paving stone, blaming their expensive flour or their sourdough starter. The truth is much simpler: they hadn’t mastered how to create steam at home to allow the dough to expand before the crust sets. If you don’t respect the steam, the bread cannot breathe, and it will never give you that thin, crackling shatter that makes a loaf truly alive.
I am not going to give you a list of gadgets you don’t need or tell you that a specific brand of spray bottle is the magic answer. Instead, I’m going to show you how to manipulate the heat and moisture you already have in your kitchen to mimic a professional deck oven. We will talk about the timing of your water additions and why a heavy tray of lava rocks might be better than a misting bottle. I’ll teach you to listen to your oven so you can stop guessing and start baking with confidence.
Guide Overview
Tools & Supplies
- Stove or kettle (heat source)
- Pot or vessel (container for water)
- Water (2-4 cups)
- Essential oils (optional, 5-10 drops)
Step-by-Step Instructions
- 1. First, you need to decide if you are baking a single loaf or a whole batch, because that dictates how much moisture you’ll need to fight the heat. If you’re just doing one loaf, a heavy cast-iron Dutch oven is your best friend; it traps the steam that the dough itself releases, acting like a tiny, private sauna. If you’re using a standard baking sheet, you’ll need to be much more proactive with an external source of water.
- 2. If you are using the Dutch oven method, preheat that pot inside your oven alongside your baking stone or tray. You want the iron to be scalding hot before the dough even touches it. When you’re ready, drop your shaped loaf into the pot, pop the lid on tight, and get it into the oven immediately. The lid keeps the steam from escaping, allowing the crust to stay supple while the bread expands.
- 3. For those of you working with a plain baking tray, you’ll need to create a “steam pan.” Find a heavy metal tray or a cast-iron skillet that can sit on the very bottom rack of your oven. While your bread is proofing, make sure this pan is sitting in the oven getting as hot as it can possibly get. If you put a cold pan into a hot oven, you’ll shock the temperature and lose your momentum.
- 4. Now, you need your boiling water. Don’t you dare use lukewarm tap water; it needs to be at a rolling boil to create an instant cloud of vapor. Keep a kettle right next to your oven so you aren’t wandering around the kitchen while the heat is working. You want that water to hit the hot metal with enough force to create a visible burst of steam the second you shut the door.
- 5. The moment you slide your loaves into the oven, carefully pour about two cups of that boiling water into your preheated steam pan. Be extremely careful here—the steam will jump up at you, and a splash of boiling water on a hot floor is a recipe for a trip to the doctor. Use a heavy-duty tray to avoid spills, and shut the oven door quickly to trap that humidity inside.
- 6. You must resist the urge to peek. Most people open the door too early because they are anxious to see if the crust is forming, but that single act lets all your precious steam escape. Leave the oven closed for at least the first twenty minutes of the bake. This is when the “oven spring” happens, and the dough needs that saturated air to stretch its skin without tearing.
- 7. About halfway through the bake, once the structure is set and the loaf has reached its full height, you can finally vent the oven. This is when you remove the lid of your Dutch oven or pull out the steam pan. You want the environment to become dry for the final stretch so the crust can actually set and caramelize. If you keep the steam in too long, you’ll end up with a crust that is tough and leathery rather than crisp and thin.
Boiling Water for Steam the Simple Physics of Moisture Control
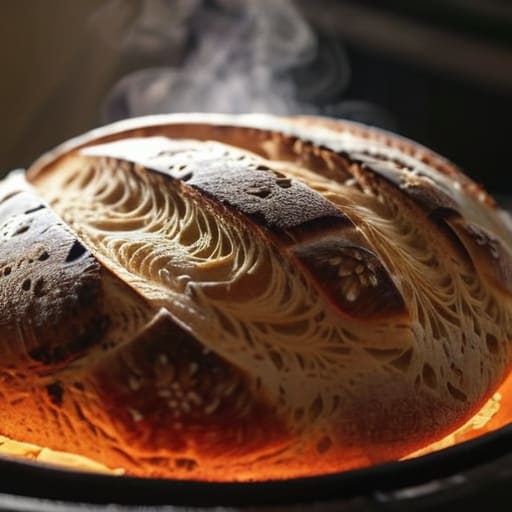
Now, don’t go thinking that just throwing a splash of water into a hot pan is enough. When we talk about boiling water for steam, we are really talking about managing a sudden burst of energy. The goal isn’t just to make the oven humid; it’s to create a micro-climate that keeps the dough’s surface supple. If the skin of your loaf sets too quickly because the air is dry, it won’t expand, and you’ll end up with a heavy, stunted boule instead of a proud, soaring loaf.
Most people treat moisture control in cooking like an afterthought, but in bread, it is everything. If you are using a Dutch oven, you are essentially creating your own steam injection for baking by trapping the moisture the dough itself releases. But if you’re working in a standard home oven, you have to be much more deliberate. I’ve seen many a beginner burn themselves trying to rush the process; remember, the water needs to be at a rolling boil the moment it hits the heat. You aren’t just adding wetness; you are giving the bread the permission to grow.
Homemade Steamer Methods for Those Who Respect the Crust
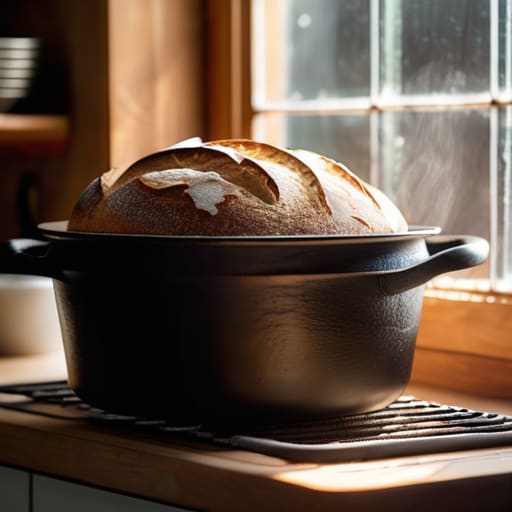
If you aren’t lucky enough to own a professional deck oven with built-in steam injection for baking, don’t let that discourage you. Most of my best loaves were born in a standard domestic oven that couldn’t produce half the moisture a bakery does. The secret to successful homemade steamer methods isn’t about buying expensive gadgets; it’s about how you manage the transition from the counter to the heat. I’ve always found that a heavy Dutch oven is the most reliable steam oven alternative for a home kitchen. By trapping the moisture escaping from the dough itself, you create a micro-environment that keeps the surface supple, allowing the bread to expand fully before the crust sets.
For those baking on a flat stone or tray, you’ll need to be a bit more intentional with your moisture control in cooking. I like to keep a cast-iron skillet on the bottom rack, preheated until it’s screaming hot, and pour in a cup of boiling water the second the loaf goes in. You have to be quick and careful—that sudden plume of steam is magic, but it’s also a burn hazard. If you find your crust is still too thick, you likely didn’t use enough water or your oven wasn’t hot enough to turn that liquid into a proper cloud.
Five ways to keep your oven from stealing your crust
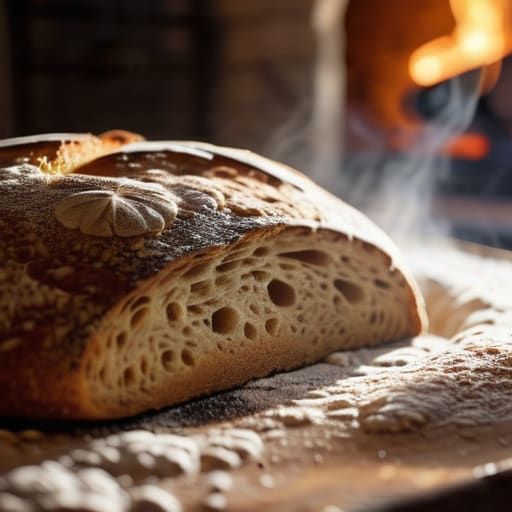
- Don’t be afraid of the heat; if you’re using a heavy cast iron pot to trap steam, make sure that pot is screaming hot before the dough goes in, otherwise you’re just warming a loaf in a damp box instead of hitting it with a burst of energy.
- Watch your timing with the water; if you’re pouring boiling water into a tray at the bottom of the oven, you have to be quick and decisive—if you linger too long with the oven door open, you’ve let all that precious moisture escape into the kitchen instead of into the bread.
- Learn to read the air in your kitchen; on a damp, rainy afternoon, your dough will feel different and you might not need nearly as much supplemental steam as you would on a dry, biting winter day.
- Respect the surface tension; if you’ve rushed your shaping and the skin of the dough is already tight and “set,” even the best steam in the world won’t help you get that beautiful, dramatic oven spring.
- Stop obsessing over the “perfect” mist and start looking at the crust; if it looks dull and feels like leather, you didn’t give it enough moisture, but if it’s crackling and thin, you’ve finally learned how to make the oven breathe.
What to remember when the oven door closes
Steam isn’t a luxury; it’s the only way to keep the skin of your dough supple enough to expand. If you skip the moisture, you aren’t baking bread, you’re making heavy, blunt stones that can’t grow.
Don’t trust a timer over your senses. You’ll know the steam has done its job when the crust looks thin and crackling rather than dull and thick, and the loaf has reached its full, proud volume.
Temperature and timing are your real masters. A splash of water in a cold oven won’t do a lick of good; you have to ensure your heat is established and your moisture is immediate to respect the life of the dough.
The Breath of the Oven
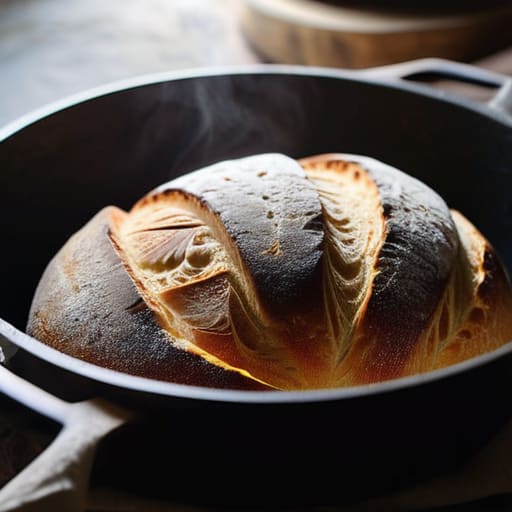
At the end of the day, whether you are using a heavy cast-iron Dutch oven to trap your own moisture or a tray of boiling water to coax steam into the air, the goal remains the same: you are trying to keep that dough skin supple long enough for the bread to truly expand. Remember that steam isn’t just a trick for a shiny crust; it is what allows the oven spring to happen without the surface setting too early and cracking like old leather. If you find your loaves are coming out heavy and dull, don’t go blaming your flour or your starter. Look back at your moisture levels and your heat management. It usually comes down to whether you gave the dough the freedom to breathe during those first critical minutes of baking.
I spent thirty-four years watching the steam rise in my own kitchen, and I can tell you that you will never truly master it by reading a manual. You master it by watching how the crust reacts, feeling the heat against your skin, and learning to trust your senses over a timer. There will be days when your crust is too thick or your score doesn’t open quite right, but don’t let that discourage you. Every failed loaf is just a lesson in temperature and timing. Keep your weights exact, keep your oven hot, and most importantly, be patient with the process. The best bread isn’t made by machines; it’s made by people who aren’t afraid to get their hands a little messy.
Frequently Asked Questions
If I'm using a Dutch oven to trap steam, do I still need to add a tray of boiling water to the bottom of the oven?
No, you don’t. If you’re using a Dutch oven, you’ve already built your own little micro-climate. The dough releases its own moisture as it heats, and that heavy lid traps it right against the crust where it’s needed most. Adding an extra tray of water to the oven floor would just turn your kitchen into a sauna and potentially overheat your oven’s sensors. Trust the pot; it’s doing the work for you.
How can I tell if I've overdone it with the moisture and turned my crust gummy instead of crisp?
If your crust feels like damp leather or sticks to your fingers instead of shattering when you press it, you’ve let the steam linger too long. Steam is for the first ten minutes to let the loaf expand; after that, you must vent it. If you don’t let that moisture escape, the crust stays soft and turns gummy. It’s a delicate balance—you want the oven breathing, not drowning in a cloud.
Will using a spray bottle to mist the oven walls work, or am I just going to end up with a cold oven and a sad loaf?
Don’t bother with the spray bottle. You’ll end up with a lukewarm oven and a loaf that looks like it’s been sitting in a damp basement. Spraying mist is too superficial; it evaporates before it can actually do the work of keeping that crust supple. If you want the bread to expand properly, you need a concentrated burst of heavy steam, not a light drizzle. Stick to a tray of boiling water or a heavy cast iron pot.