Most people think that if their loaf comes out looking like a collapsed, sad brick, they’ve somehow failed the recipe, but that is a lie. I spent thirty years watching customers bring me dense, heavy loaves and blaming their flour, when the real culprit was almost always how they handled the dough before it ever touched the metal. If you are struggling with how to bake bread in a loaf tin, stop looking at your measuring cups and start looking at your hands. A tin isn’t just a container; it’s a boundary that demands a specific kind of tension and respect, or it will simply squash the life out of your fermentation.
I’m not going to give you a list of fancy gadgets or tell you that you need a professional deck oven to get a decent crumb. Instead, I am going to teach you the language of the dough—how to recognize the exact moment it is ready for the tin, how to manage your hydration percentages so the sides don’t cave in, and how to use heat to create a crust that actually sings. We are going to focus on the things that matter: temperature, timing, and touch.
Guide Overview
Tools & Supplies
- Loaf tin (Standard metal or silicone)
- Mixing bowl (Large enough for rising)
- Measuring cups and spoons (For accuracy)
- Oven (Preheated to required temperature)
- All-purpose or bread flour (500g)
- Warm water (350ml)
- Instant yeast (7g)
- Salt (10g)
- Sugar or honey (1 tsp)
Step-by-Step Instructions
- 1. First, you need to get your measurements right, and I mean really right. Forget those measuring cups sitting in your drawer; they are nothing but a way to invite inconsistency into your kitchen. Use a digital scale to weigh out your flour, water, salt, and yeast. For a standard loaf, I like to work with a 70% hydration dough—that means if you have 500g of flour, you’re using 350g of water. It’s enough to keep the crumb soft without turning your kitchen into a battlefield of sticky mess.
- 2. Once your ingredients are in the bowl, don’t just stir them and walk away. You need to develop the structure. Mix until the flour is fully hydrated, then let it rest for about twenty minutes—what some call an autolyse—before you even think about adding the salt. This gives the flour time to wake up and start absorbing that water, which makes the kneading much easier on your wrists and much better for the final bread.
- 3. Now, we move to the bulk fermentation, and this is where most people lose their way by being too impatient. Don’t just leave the dough in a bowl and go watch television; you need to fold the dough every thirty minutes or so. Reach under the edge, pull it up, and fold it over itself. You aren’t trying to punch it; you’re trying to build strength. By the end of the second hour, the dough should feel alive, aerated, and slightly springy when you poke it.
- 4. When the dough has grown by about half its original size, it’s time to shape it. Turn it out onto a lightly floured surface—not a mountain of flour, just a whisper of it—and gently tension it into a log. You want the surface of the dough to be taut, like a drum skin. If you’re too aggressive, you’ll knock out all those beautiful bubbles we worked so hard to create, so treat it with a bit of respect.
- 5. Prepare your tin by greasing it lightly with a bit of oil or butter, but don’t go overboard. Place your shaped dough into the tin and let it undergo its final proof. This is the most critical window of time. You aren’t looking at a clock; you are looking for the rise. The dough should reach about an inch above the rim of the tin. If you press it gently with a finger, the indentation should spring back slowly—if it snaps back instantly, it needs more time; if it stays put, you’ve gone too far.
- 6. Get your oven hot—I usually aim for 220°C, but your oven is likely lying to you, so keep an eye on it. Before you slide the tin in, give the top of the dough one last, very gentle score with a sharp blade. This isn’t just for decoration; it gives the steam a place to escape so the bread doesn’t burst at the seams. Once it’s in, try to drop a small tray of water onto the bottom of the oven to create a bit of steam. It keeps the crust from setting too quickly, allowing the loaf to expand fully.
- 7. Finally, when the crust is a deep, burnished mahogany, pull it out. Don’t just leave it in the tin, or the bottom will get soggy from its own breath. Turn it out onto a wire rack immediately. And for heaven’s sake, wait to slice it. I know it smells like heaven, but if you cut into it while it’s still steaming, you’ll turn that beautiful interior into a gummy, heavy mess. The bread is still cooking itself on the rack; give it the time it deserves.
A Loaf Tin Sizing Guide for the Patient Baker
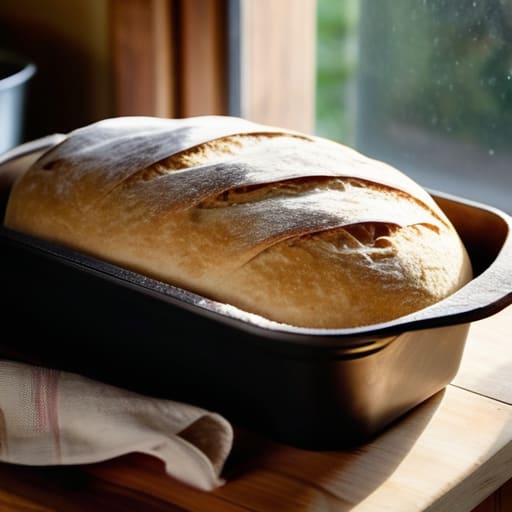
Now, don’t go grabbing the first metal box you find in the cupboard and assuming it’ll work. Most beginners fail because they try to force a massive, high-hydration dough into a tin that’s too small, resulting in a shapeless, gummy mess that looks more like a brick than a loaf. My little loaf tin sizing guide is simple: you aren’t just measuring the metal; you’re measuring the room the dough needs to expand. If your dough is 75% hydration, it’s going to want to climb those walls and spill over. You want the dough to fill about two-thirds of the tin before its final proof, giving it just enough space to reach the rim without losing its structural integrity.
If you find your crust is tearing or, worse, the loaf is struggling to lift, it might be that your oven temperature for yeast bread is slightly off, or your tin is too shallow. If you’re worried about preventing bread sticking to tin, forget those chemical sprays. A proper, heavy layer of melted butter or a light dusting of flour is all a seasoned hand needs. Just remember, the tin is there to guide the shape, not to imprison the dough.
Mastering Yeast Bread Proofing Stages Without Rushing
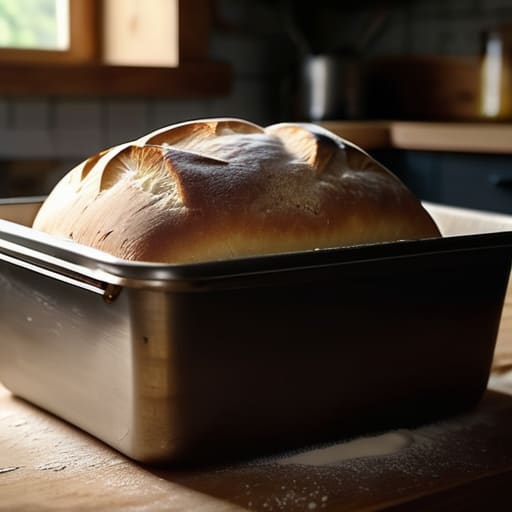
You can have the perfect flour and the most expensive tin, but if you treat your proofing like a race, you’ll end up with a dense, heavy brick. Most people fail because they look at the clock instead of the dough. I’ve spent decades watching dough, and I can tell you that the yeast bread proofing stages don’t care what your timer says; they only care about the ambient temperature of your kitchen. If your house is drafty, that dough is going to take its sweet time, and you must let it.
When you’re moving from the bulk ferment to the final shape in the tin, don’t just shove it in and call it a day. You need to watch for that gentle, pillowy swell. A good rule of thumb is the finger poke test: press the dough lightly, and if it springs back slowly but leaves a small indentation, it’s ready for the heat. If it snaps back instantly, it’s under-proofed and will likely burst awkwardly. Patience is your best tool here; rushing this stage is exactly how you end up with a loaf that lacks structure and flavor.
Five Things Your Oven Won't Tell You
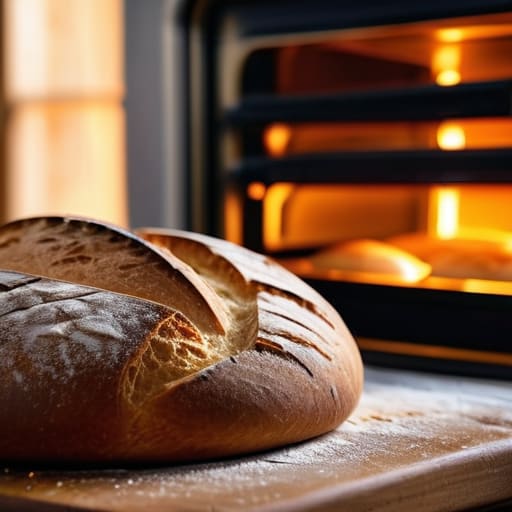
- Stop relying on your eyes to judge the rise. A dough that looks “big enough” in the tin is often one that will collapse the moment the heat hits it. You need to look for that gentle, pillowy tension where the dough just barely meets the rim of the tin, looking like it’s holding its breath.
- Temperature is your silent partner. If your kitchen is a drafty cellar, your dough will sit in that tin like a stone; if it’s too warm, it’ll turn into a sticky, over-proofed mess before you’ve even preheated the oven. Use a thermometer to check your water, and don’t be afraid to wrap the tin in a tea towel if the room is being unkind.
- Don’t fear the fat, but don’t drown the bread either. A light coating of butter or a thin film of oil on the inside of the tin isn’t just for easy release—it creates a tiny thermal barrier that helps the crust develop a proper, even color rather than sticking and tearing.
- The “Scoring” Secret. When you go to slash the top of your loaf, don’t just hack at it. Use a very sharp blade and a confident, swift motion. If you hesitate or drag the knife, you’ll tear the skin of the dough, and your beautiful loaf will bleed out its gases through a jagged crack instead of a clean, controlled expansion.
- Give the tin a moment to breathe after it comes out. If you leave the bread in the tin until it’s completely cold, the steam trapped underneath will turn your crust soft and sad. Turn the tin upside down on a wire rack immediately so the bottom can breathe, or you’ll lose everything you worked for.
Three Things to Carry in Your Mind When the Oven Door Closes
Trust the dough’s feel, not the clock; a recipe might say sixty minutes, but if your kitchen is drafty and the dough feels tight and stubborn, it needs more time, not more speed.
Stop measuring by volume and start by weight; a cup of flour can vary by twenty grams depending on how hard you pack it, but a percentage stays true whether you’re making one loaf or ten.
Respect the tension in the tin; don’t just dump the dough in and hope for the best, but settle it gently so the surface tension remains intact, giving the bread the strength to climb the walls rather than spreading out like a puddle.
The Final Crumb
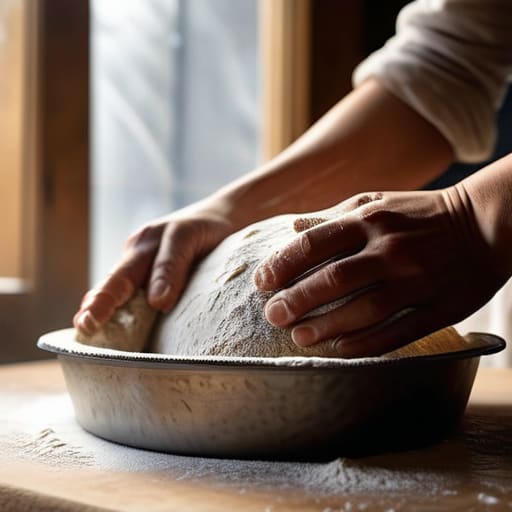
If you’ve followed along, you know that baking in a tin isn’t just about following a list of instructions; it’s about understanding the relationship between your flour, your water, and the space you give them to grow. Remember that your tin size dictates your hydration limits, and that rushing the proof is the fastest way to end up with a dense, gummy brick. Keep your eyes on the dough’s tension rather than the clock, and never forget that a little extra warmth in a cold kitchen can be the difference between a magnificent rise and a flat disappointment. It comes down to the math of the percentages and the patience of your hands.
At the end of the day, your kitchen will be a mess of flour and sticky fingerprints, and that is exactly how it ought to be. Don’t get discouraged if your first few loaves don’t look like the polished pictures in a magazine; even after thirty-four years, I still have days where the dough doesn’t behave. Bread is a living thing, and it will teach you more about life than any textbook ever could. Just keep your weights accurate, keep your heart steady, and remember that the best part of baking isn’t the perfection of the shape, but the soul of the crust when it finally hits the table.
Frequently Asked Questions
My dough seems to stick to the sides of the tin even after I've greased it; am I using too much fat or is my hydration too high?
It’s likely a bit of both, but don’t go throwing more butter at the problem. If your hydration is high—say, 75% or more—the dough is naturally more spirited and wants to cling. Instead of just greasing, try a light dusting of flour or even semolina to create a physical barrier. If you over-grease, you’re just making a slippery mess that won’t climb the walls properly. Trust the dough’s stickiness; it’s just life.
Should I shape the dough into a tight log before putting it in the tin, or just let it spread out naturally as it rises?
You want tension, not a mess. If you just plop a loose mass into that tin, it’ll spread sideways like a puddle instead of climbing upward. You need to shape it into a tight, smooth log—pulling the skin of the dough taut as you go. That surface tension is what holds the gases in, forcing the bread to rise toward the lid rather than spilling over the edges. Feel for that resistance under your palms.
If I'm using a heavy cast iron loaf tin instead of a thin aluminum one, how much should I adjust my oven temperature to prevent a burnt crust?
Cast iron is a different beast entirely; it holds onto heat like a grudge. If you’re swapping thin aluminum for heavy iron, drop your oven temperature by about 15°C (roughly 25°F). That heavy metal will soak up the heat and blast the sides of your loaf before the center has even woken up. You want a steady, gentle soak, not a thermal ambush. Let the iron do the work, but don’t let it bully the crust.