I remember standing in my bakery at five in the morning, staring at a beautiful sponge that looked like a disaster because I’d tried to rush the final finish. I thought if I just applied more frosting, I could hide the mess, but all I did was create a heavy, slumped mountain of sugar that looked more like a landslide than a celebration. Most people think the secret to a professional finish is a fancy turntable or a high-end spatula, but the truth is that knowing how to crumb coat a cake is actually about restraint. You aren’t trying to decorate yet; you are simply building a structural seal to trap those loose, unruly crumbs before they ruin your hard work.
In this guide, I’m going to strip away the fluff and tell you exactly how to handle your frosting so it behaves. We aren’t going to chase perfection in a single pass; instead, I’ll show you how to apply a thin, honest layer that acts as a foundation. I’ll explain why your temperature matters more than your technique and how to recognize when that base layer is actually set and ready for the final coat.
Guide Overview
Tools & Supplies
- Offset spatula for spreading frosting evenly
- Turntable for rotating the cake smoothly
- Bench scraper for smoothing the sides
- Frosting or buttercream (approx. 1-2 cups)
- Baked cake layers (2-3 layers)
Step-by-Step Instructions
- 1. First, you must ensure your cake is completely cold. I don’t care if the recipe says it’s ready after an hour; if the center of that sponge is still even slightly warm, your frosting will melt into a greasy mess the moment it touches the surface. I always let my layers sit on a wire rack until they feel like they’ve been sitting in a cellar, because a warm cake is a defeated cake.
- 2. Once your layers are chilled, stack them with a thin, even layer of filling in between. Use an offset spatula to sweep the frosting toward the edges, but don’t worry about making it pretty yet. At this stage, we are just building the structural integrity of the stack. If your layers are uneven, don’t try to fix it with more frosting; just level them with a serrated knife before you start, or you’ll be fighting a losing battle against gravity.
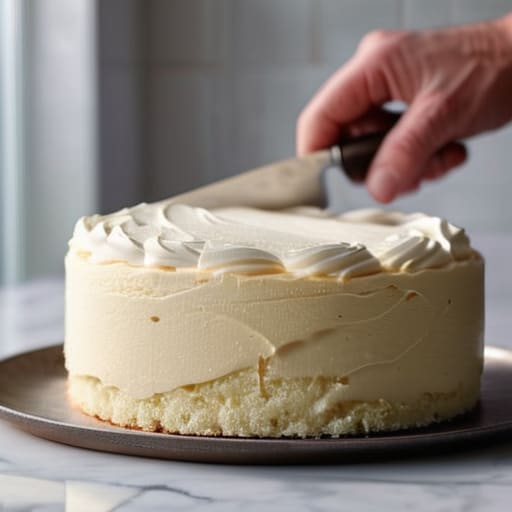
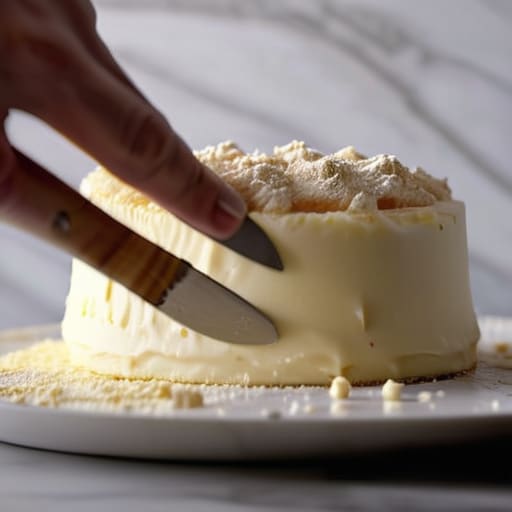
- 3. Now, take a small amount of your frosting—about 10% of what you’ll use for the final layer—and begin the actual coating. You aren’t trying to cover the cake; you are trying to trap the crumbs. Work in thin, decisive strokes, sweeping the spatula from the center outward toward the edges. If you see little bits of sponge breaking off, don’t panic; that’s exactly what we’re looking for.
- 4. Use a bench scraper or a large offset spatula to smooth this thin layer over the sides and top. You want a layer that is barely there, just enough to create a seal. If you apply too much now, you’ll end up with a thick, heavy layer of frosting that masks the flavor of the cake, and we aren’t here to eat flavored lard; we’re here to eat cake.
- 5. This is the part where most people lose their patience, but it’s the most vital: put the cake back in the refrigerator. You need to let that thin layer set firmly for at least twenty or thirty minutes. I like to see the frosting look matte and dry, not shiny and soft. If the crumb coat hasn’t hardened, your final layer will just drag those loose bits across the surface, and you’ll be back to square one.
- 6. Finally, take a clean spatula and a small amount of fresh frosting to perform a final inspection. If you see any stubborn bits of sponge peeking through the hardened seal, gently scrape them away. Once the surface feels smooth and stable under your tool, you have successfully built your foundation. Now, and only now, are you actually ready to decorate.
Leveling Cake Layers Before the First Touch
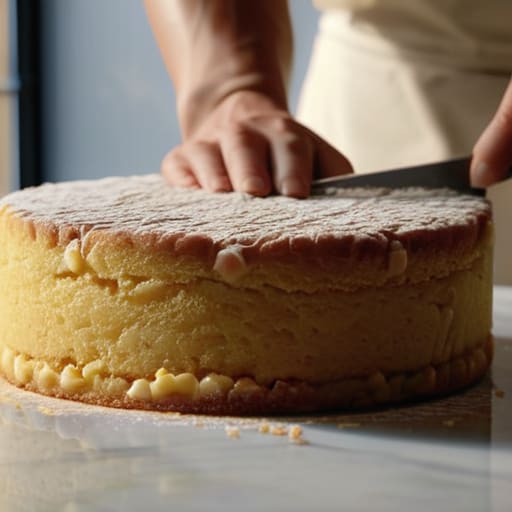
Before you even think about reaching for your frosting, you have to address the reality of the sponge. Most cakes come out of the oven with a slight dome, a little mountain peak that wants to ruin your symmetry. If you try to build a crumb coat on top of uneven layers, you’ll spend the whole afternoon fighting gravity and tilting your cake stand. I always tell my apprentices that leveling cake layers is the most honest work you’ll do; it’s not glamorous, but it’s the difference between a professional finish and a leaning tower. Use a serrated knife or a cake leveler to trim those domes off until your layers are as flat as a countertop.
Once you have those flat surfaces, don’t just stack them and pray. A little bit of filling between the layers acts as the glue, but it also creates a structural foundation. If your layers are even slightly wobbly, your buttercream smoothing methods will be a nightmare because the cake will shift under the pressure of your spatula. Take a moment to ensure everything is stable and centered. You aren’t just preparing to decorate; you are setting the stage for a finish that won’t crumble when you finally slice into it.
Preventing Crumbs in Frosting Through Measured Patience
Most people think the crumbs are the enemy, but they are actually just an invitation to slow down. If you find yourself fighting a losing battle against stray bits of sponge, it is usually because your cake is too warm or your hands are moving too fast. When I was running the bakery, I saw so many young decorators try to force a thick layer of frosting over a cake that hadn’t fully settled. You cannot rush the cooling process. If that sponge is even slightly lukewarm, it will melt your fats on contact, turning your beautiful buttercream into a greasy mess that traps every single crumb inside.
When you finally sit down to work, remember that preventing crumbs in frosting is less about the strength of your stroke and more about the lightness of your touch. Use your offset spatula to skim the surface rather than digging into it. You aren’t trying to build a wall; you are just laying a thin, honest veil. If you see a cluster of crumbs, don’t keep spreading over them—that just integrates them deeper. Instead, scrape them off and start that section again. Patience is your most reliable tool, even more so than any expensive kit.
Five Hard Truths for a Clean Finish
- Chill your layers until they are firm to the touch. If you try to crumb coat a cake that’s still breathing warmth, the frosting will simply slide off like butter on hot toast, taking half your hard work with it.
- Use a thin, honest layer of frosting. You aren’t trying to decorate yet; you’re just trying to seal the cracks. If you go too heavy, you’ll end up fighting a mountain of cream instead of smoothing a surface.
- Don’t be afraid of the crumbs. When you see those little bits of sponge migrating into your frosting, leave them be. That’s the coat doing exactly what it’s meant to do—trapping the debris so your final layer stays pristine.
- Watch your temperature like a hawk. If your kitchen is too warm, your frosting will lose its structure and become a slippery mess. If it’s too cold, you’ll be scrubbing at it like you’re sanding wood. Aim for a comfortable middle ground.
- Give the cake time to rest in the fridge. A crumb coat isn’t finished the moment the spatula leaves the cake; it’s finished when the frosting has set and become a structural part of the whole. Patience is what turns a messy sponge into a professional finish.
The Three Truths of a Clean Finish
Temperature is your silent partner; if your frosting feels greasy or your cake feels warm, stop everything and wait, because trying to trap crumbs in a soft foundation is a losing battle.
Trust your hands over your eyes; a crumb coat isn’t about making the cake look pretty, it’s about creating a tight, structural seal that holds the stray bits hostage.
Resist the urge to thicken the frosting to hide mistakes; a thin, honest layer is much easier to work with than a heavy, clumpy mess that will only drag your final coat down with it.
The Quiet Virtue of the Clean Finish
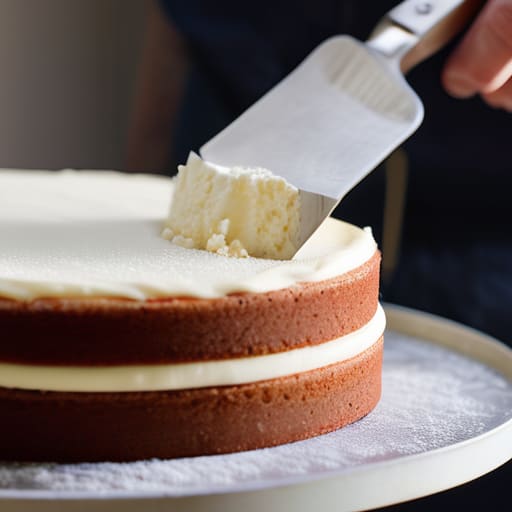
At the end of the day, a successful crumb coat isn’t about achieving perfection on the first pass; it is about respecting the physics of the cake. You have leveled your layers, you have kept your workspace tidy, and you have applied that thin, honest layer of frosting to trap the stray crumbs before they can ruin your final coat. Remember that the temperature of your frosting and the patience of your hands are just as vital as the ingredients themselves. If the frosting is too warm, it slides; if you rush the chill time, the crumbs will simply migrate through the new layer. Treat that first thin coat as the necessary foundation that holds everything else together.
I spent decades watching people try to skip this step, thinking they could save ten minutes only to spend an hour trying to scrape grey streaks of sponge out of their beautiful buttercream. Don’t be one of them. Baking is a series of small, disciplined movements that lead to a grand result, and the crumb coat is where that discipline is tested. When you finally go in for that thick, final layer of decoration, you won’t be fighting the cake; you’ll be dancing with it. Trust the process, respect the chill time, and remember that the best things in life—much like a well-built cake—are never rushed.
Frequently Asked Questions
My frosting feels too stiff to spread without tearing the cake; should I warm it up or just push through?
Don’t you dare push through. If you force stiff frosting over a delicate crumb, you aren’t coating the cake; you’re performing surgery on it, and the cake will lose. If it’s too stubborn, warm it slightly—just a few seconds in your hands or a very brief moment near a warm spot—until it moves like soft butter. You want it to glide, not fight. If it’s fighting you, it’s not ready to work.
How long do I actually need to let that thin layer set in the fridge before I attempt the final coat?
If you’re looking for a stopwatch, you’re looking in the wrong place. I’ve seen people rush it after twenty minutes only to have the final coat drag the crumbs right back out. Give it at least thirty to forty-five minutes. You aren’t waiting for the frosting to turn into stone; you’re waiting for it to become a firm, stable skin. Touch it gently with a fingertip—if it doesn’t feel tacky or move under pressure, you’re ready.
Is it a disaster if I see a few stray crumbs peeking through the base layer, or can I just cover them in the next pass?
If you see a few stray crumbs, don’t panic and certainly don’t try to smear them away with more frosting. That’s how you end up with a muddy, grey-looking mess. If they’re just tiny specks, leave them be; the second layer will do its job. But if you’ve got a cluster of crumbs, scrape that layer off and start the base again. A cake built on a messy foundation will never stand straight.