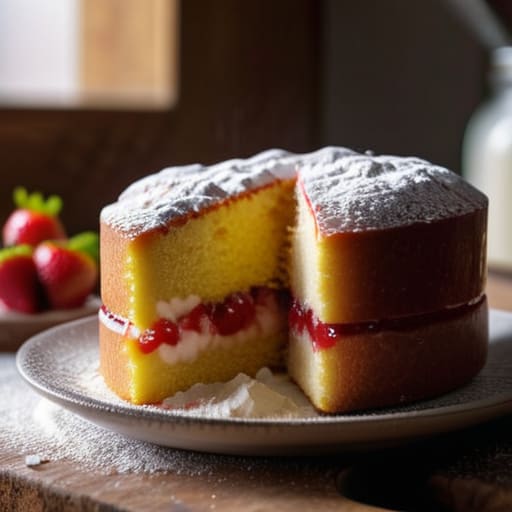
People will tell you that the secret to a perfect Victoria sponge is a fancy stand mixer or a specific brand of expensive butter, but they are lying to you. I spent thirty years watching people ruin perfectly good ingredients because they were too busy following a glossy photograph and not enough time listening to their own hands. If you want to learn how to make a Victoria sponge properly, you have to stop treating it like a chemistry experiment and start treating it like a conversation between your ingredients and the room temperature. A sponge doesn’t fail because you used the wrong flour; it fails because your butter was too cold to truly marry the sugar, or because you rushed the aeration just to get it in the oven faster.
I’m not here to give you a list of measurements that rely on those fickle little measuring cups, nor will I promise you a cake that looks like it belongs in a magazine. Instead, I am going to teach you the weight of the batter and the exact moment the emulsion is ready. We will focus on the rhythm of the creaming and the temperature of your kitchen, because once you understand the physics of the fat and the air, you won’t need a recipe to guide you anymore.
Recipe Details
Ingredients
- 225g unsalted butter, softened
- 225g caster sugar
- 4 large free-range eggs
- 225g self-raising flour
- 1 tsp baking powder
- 2 tbsp milk
- 150g raspberry jam
- 150ml double cream, whipped
- 1 tbsp icing sugar, for dusting
Recipe Instructions
Step 1
Before you even touch a bowl, get your ingredients to room temperature. I don’t care what the packet says; if you pull eggs straight from a cold fridge and drop them into creamed butter, you’ll end up with a curdled mess that no amount of sifting will fix. Set your eggs and butter out at least an hour before you start. While you wait, weigh out your ingredients using a digital scale. We are working with a 70% hydration-style ratio of fat and sugar to flour, so don’t you dare reach for a measuring cup.
Step 2
Cream your butter and caster sugar together until the mixture is pale and looks like it might actually hold its own weight. You aren’t just mixing them; you are beating air into the fat. If you stop too early because you’re in a hurry, your sponge will be dense and greasy rather than light and springy. Once it looks fluffy, add your eggs one at a time, whisking well after each addition. If it starts to look like it’s splitting, add a tablespoon of your flour to bind it back together.
Step 3
Now, fold in your flour. This is where most people ruin a perfectly good batter by being too heavy-handed. Use a large metal spoon or a spatula, and move in a figure-eight motion. You aren’t stirring; you are incorporating. You want to see the flour disappear into the creamed mixture without knocking out all those lovely air bubbles you just spent ten minutes creating. If you overwork it here, you’ll develop gluten, and you’ll end up with a rubbery cake instead of a sponge.
Step 4
Divide your batter between two lined tins and give them a single, sharp tap on the counter. This isn’t to “settle” the batter, but to pop any large air bubbles that might cause your sponge to rise unevenly or create big, ugly holes. Get them into a preheated oven immediately. If your oven is temperamental—and let’s be honest, most are—try to place them in the middle. You’re looking for a gentle, even heat to coax the rise, not a blast that sets the crust before the center has even woken up.
Step 5
Resist the urge to peek. I know the smell is tempting, but opening that door too early lets the heat escape and can cause the center to collapse like a tired lung. Wait until at least twenty-five minutes have passed. The sponges are done when they are golden, the edges are just slightly pulling away from the tin, and the centers spring back when you press them very lightly with a finger. Once they’re out, let them rest in the tins for ten minutes before moving them to a wire rack; a sponge is at its most fragile the second it leaves the heat.
The Equal Weight Ingredients Ratio and the Creaming Method Truth
You’ll often hear people argue about the all-in-one method vs creaming method, as if one is a shortcut and the other is a science. In my shop, I’ve seen both, but if you want that specific, cloud-like lift, you must cream your butter and sugar until they look like pale, aerated velvet. It isn’t just about mixing; it’s about trapping air. If your butter is too cold, you’ll never get the volume, and if it’s too oily, your cake will turn out heavy and greasy. The equal weight ingredients ratio—the soul of the Victoria sponge—only works if you respect the physics of that aeration.
Once you’ve mastered the batter, the real battle is with the oven. Most people fail by peeking too early or running a hot oven to “speed things up.” That is a recipe for disaster. If you don’t maintain a steady, moderate heat, you’ll end up avoiding sunken sponge cakes only to find they’ve risen too fast and collapsed in the center. Watch the edges; when they just begin to pull away from the tin, they are ready. Don’t rush the cooling, either. A sponge needs to settle before it meets its jam and cream.
Avoiding Sunken Sponge Cakes Through Temperature and Patience
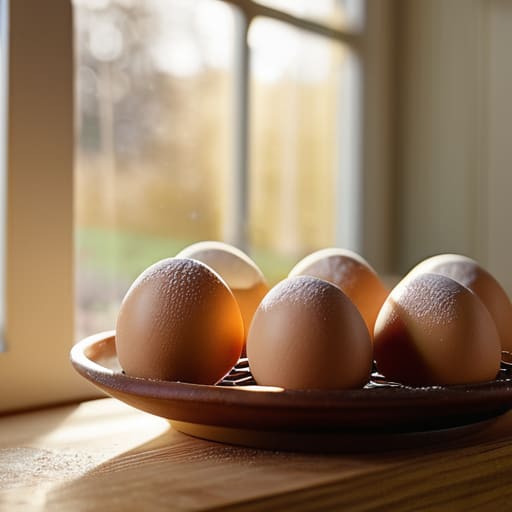
If you’ve ever pulled a cake from the oven only to watch it sigh and collapse in the middle, you haven’t failed the recipe; you’ve likely just fought the physics of heat. Avoiding sunken sponge cakes is rarely about the flour and almost always about the relationship between your oven and your eggs. If your eggs are straight from the fridge, they’ll struggle to emulsify with the butter, creating a heavy, unstable structure that can’t hold its own weight once the heat hits it. I always tell my apprentices to let everything sit out until it reaches room temperature; if the ingredients are fighting each other, the cake will fight you.
Furthermore, you must respect the baking temperature for sponge cakes. If you crank the heat too high to “speed things up,” you’ll get a beautiful, rapid rise that creates a hollow, fragile crust which inevitably caves in as it cools. You want a steady, gentle climb. Don’t be tempted to peek through the glass too early, either. Every time you crack that door, you’re letting out the very steam and heat that keeps those air bubbles inflated. Patience isn’t just a virtue in a bakery; it’s a structural necessity.
Five Things Your Recipe Won't Tell You About a Real Sponge
- Stop reaching for the fridge; your eggs and butter must be at room temperature, or you’ll spend twenty minutes fighting a curdled mess that refuses to emulsify. If the butter is too cold, it won’t hold the air, and if the eggs are chilled, they’ll collapse the fat you just spent time creaming.
- Forget the “golden brown” instruction in most books; watch the cake’s movement instead. A Victoria sponge is done when the top springs back firmly when touched lightly, not just when it hits a specific minute on a timer. A timer doesn’t know if your kitchen is drafty or if your oven is running hot.
- Sift your flour twice, and I mean it. You aren’t just removing lumps; you are aerating the particles so they can be folded into that precious butter and sugar without deflating the whole structure. If you dump heavy, packed flour into your batter, you’re asking for a dense, rubbery sponge.
- The folding process is a conversation, not a struggle. Use a large metal spoon or a spatula and move in a figure-eight pattern, lifting from the bottom and turning. If you’re stirring like you’re mixing a stew, you’re knocking the air out, and air is the only thing that makes a sponge a sponge.
- Let the sponges cool completely in the tin for ten minutes before you even think about turning them out onto a wire rack. If you rush them onto a cold surface too soon, the steam escapes too fast and the structure collapses, leaving you with a sad, sunken middle that no amount of jam can fix.
The Three Pillars of a Proper Sponge
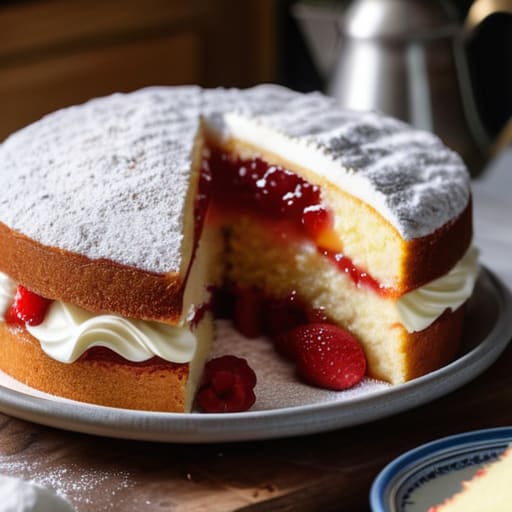
Stop reaching for measuring cups; use a scale to ensure your flour, sugar, butter, and eggs are in a true 1:1:1:1 ratio, because a sponge that isn’t balanced will never hold its own weight.
Watch the temperature of your butter like a hawk; if it’s too cold, you won’t trap the air needed for lift, and if it’s too oily, your cake will turn out heavy and greasy rather than light and aerated.
Trust your senses over the oven timer; a cake is done when it feels springy to a gentle touch and pulls away slightly from the edges, because rushing it out too early is a guaranteed way to end up with a collapsed center.
The Final Fold
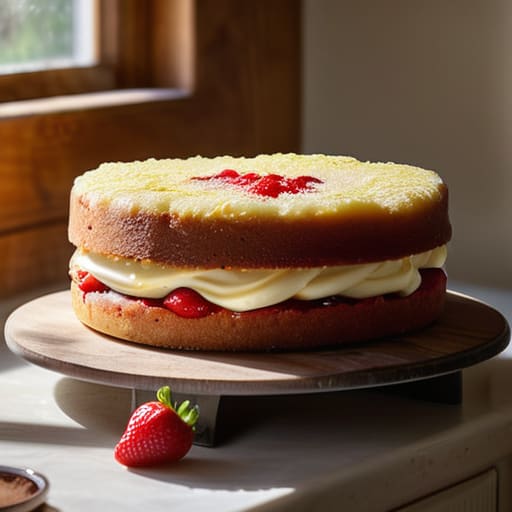
If you walk away with nothing else, remember that a Victoria sponge is a game of physics, not luck. It is about the marriage of room-temperature fats and the precise, equal-weight ratio that gives the cake its structural integrity. You cannot cheat the creaming method by rushing the butter and sugar, nor can you bypass the necessity of folding those eggs in with a gentle hand to preserve the air you worked so hard to create. If your cake is dense, don’t blame the flour; look back at your temperature control and whether you let the batter sit too long in a drafty kitchen. When you respect the weight and the warmth, the sponge practically makes itself.
At the end of the day, a cake is more than just a collection of measurements on a scale. It is a living thing that responds to how you treat it in the quiet moments between mixing and baking. There will be days when the oven runs hot or your hands are a bit too heavy, and that is perfectly fine. Baking isn’t about achieving a sterile, photographic perfection; it is about the rhythm of the craft and the joy of pulling something honest out of the heat. So, don’t be afraid to get a little flour on your apron. Just remember that patience is your best tool, and the best sponge is the one made with a steady hand and a calm mind.
Frequently Asked Questions
My sponge comes out looking lovely but feels incredibly heavy and dense; did I overwork the flour or is my oven temperature too low?
It’s rarely the flour you’re fighting, dear; it’s the air. If it’s dense, you’ve likely knocked the life out of that batter. When you add the flour, you must treat it like a sleeping child—fold it in gently until just combined. If you stir like you’re mixing cement, you’ll develop gluten and end up with a heavy brick. Check your oven, too; if it’s too cool, the structure sets before the air can expand.
If I use a different type of flour, like a wholemeal or a stronger bread flour, how much should I adjust my hydration to stop it from being a brick?
If you’re swapping in wholemeal, you’re introducing bran, which acts like a sponge; you’ll need to bump your hydration up by about 5% to 8% to keep it from turning into a brick. Bread flour is a different beast entirely—it’s thirstier because of the protein. I’d add an extra 3% to 5% water there. Don’t trust the math alone, though; feel the batter. It should drape off the spoon, not resist it.
I noticed my sponge has a large crack running down the center—is that a sign of a rushed rise or did I cream the butter and sugar for too long?
That crack is a sign of heat and tension, not over-creaming. If you’ve creamed the butter and sugar until it’s pale and aerated, you’ve done your job; over-creaming usually leads to a collapse, not a split. A central crack means the top of your sponge set too quickly while the center was still expanding. Your oven was likely a fraction too hot, or your tins were too small for that much lift.