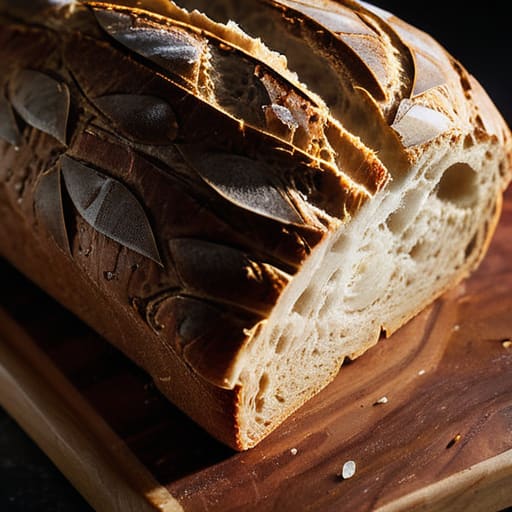
I spent thirty-four years waking up at four in the morning to the smell of yeast and the heat of a wood-fired oven, and if there is one thing I’ve learned, it’s that you cannot learn how to read a crumb by staring at a glossy, airbrushed photo on a smartphone. I’ve seen too many home bakers tear their hair out because their sourdough didn’t look like those cavernous, Instagram-perfect honeycombs, convinced they needed a thousand-dollar mixer or some exotic, expensive flour to fix it. They think the “crumb” is a destination, but they’re missing the point entirely; the crumb is actually a map of every decision you made while that dough was sitting on your counter.
I’m not here to sell you a fancy new tool or a complicated mathematical formula that requires a degree to understand. Instead, I’m going to teach you how to look at those holes and textures to see exactly where your fermentation stalled or where your hands were too heavy. We are going to talk about the living tension of the bread and how to translate what you see into what you should do differently next time. I’ll show you how to listen to the dough through the finished slice, because once you truly understand the crumb, you’ll never need to guess again.
Decoding Alveoli Structure and the Soul of the Dough
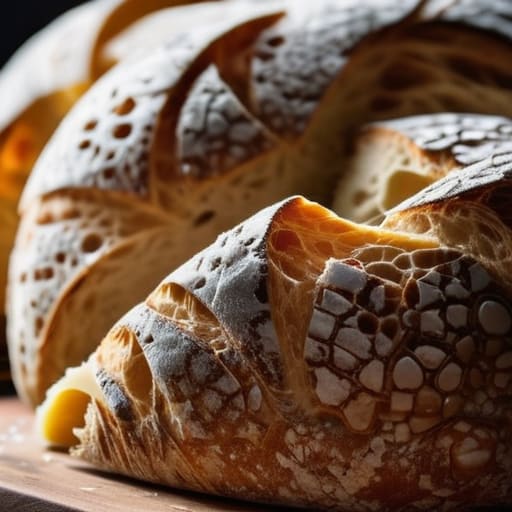
When you slice into a loaf, those little pockets of air—the alveoli structure in bread—are telling you a story about the hours that came before the oven. If you see a wild, uneven landscape of large holes, you’re looking at high sourdough hydration levels and a long, patient fermentation. Those big, beautiful gaps mean the gas was trapped by a strong, elastic network, but don’t be fooled into thinking a small, uniform hole is a failure. An open crumb vs tight crumb debate is often just a misunderstanding of intent; a sandwich loaf needs structure, while a rustic boule needs those cavernous spaces.
The real secret, though, is in the walls of those holes. If the cell walls look thin and translucent, your fermentation was likely spot on. But if they look gummy or dense, you might have rushed the dough before the yeast could truly breathe. I always tell my students to look for the gluten development signs etched into the very architecture of the slice. If the holes are collapsed or flat, you didn’t have enough tension; if they are soaring and light, you’ve mastered the art of letting the dough exist on its own terms.
Why Sourdough Hydration Levels Dictate Your Success
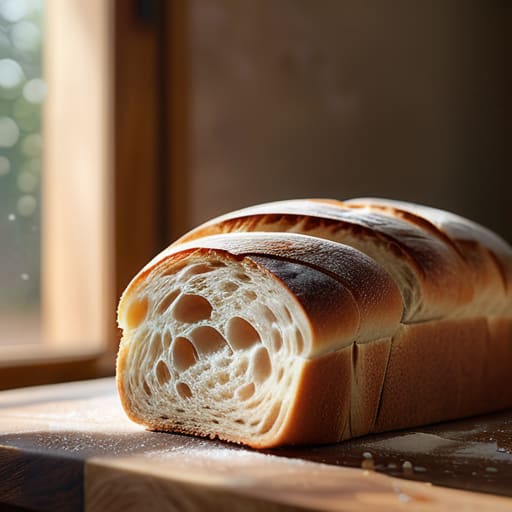
Now, don’t go thinking a higher number on your scale automatically means a better loaf. I see people chasing that elusive, wild open crumb vs tight crumb debate like it’s a prize to be won, but they forget that water is a living thing in your hands. If you’re working with a 75% hydration dough, you’re dealing with something that wants to move, to flow, and to stretch. If you haven’t mastered your gluten development signs—if that dough hasn’t been worked until it feels like a supple, silken skin—then all that extra water is just going to turn your beautiful loaf into a gummy, collapsed mess.
The truth is, sourdough hydration levels dictate how much “room” your gases have to expand. A lower hydration dough, say 65%, is much more forgiving; it holds its shape like a disciplined soldier, giving you a sturdy, even structure. But if you want those cavernous, airy holes, you have to respect the liquid. You can’t just dump more water in and expect magic; you have to learn how to handle the slackness. If the dough feels like it’s fighting you or losing its tension, you haven’t failed the recipe—you’ve just underestimated the thirst of your flour.
Five Truths Found in the Slice
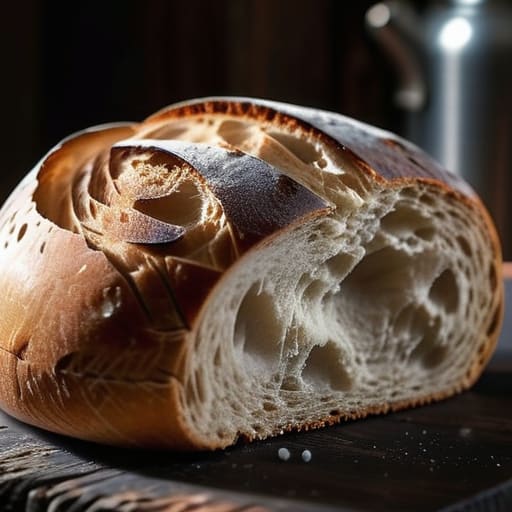
- Don’t trust your eyes alone; use your fingers to check for tension. A good crumb should push back against your touch with a springy, living resistance. If your finger leaves a permanent dent, you didn’t give that dough enough time to find its strength during the final proof, or your oven spring was stifled.
- Watch for the “fool’s crumb,” that deceptive wall of dense dough surrounding a few large, beautiful holes. It looks like a triumph of hydration, but it’s actually a sign of poor fermentation or a lack of structural integrity. You want the bubbles to be distributed, not just isolated in a cavern of under-proofed dough.
- Learn to recognize the difference between a “tight” crumb and a “dead” crumb. A tight crumb is often just a result of lower hydration or a stronger flour, and it can be quite delicious. A dead crumb, however, feels gummy and heavy—that’s a sign that you either underbaked the center or handled the dough so roughly you knocked the life right out of it.
- Pay attention to the color of the crumb, not just the shape of the holes. A pale, washed-out interior often means your fermentation was too fast and too hot, skipping the complex flavor development. You’re looking for that creamy, slightly translucent quality that tells me the enzymes have been busy doing their work.
- Use the crumb to diagnose your shaping. If you see a consistent pattern of smaller holes transitioning into larger ones, you’ve managed your tension well. If the crumb looks chaotic and collapsed in sections, you likely over-proofed it, and the gluten structure simply couldn’t hold the weight of its own gases anymore.
The Baker’s Summary: What Your Crumb Is Trying to Tell You
Stop chasing the “perfect” hole pattern you saw on social media; instead, look for the tension in the crumb that proves you didn’t rush the final proof or handle the dough too roughly.
Use your crumb as a diagnostic tool—a gummy, dense center isn’t a recipe failure, it’s a sign your oven temperature was too low or your dough was under-fermented.
Remember that hydration is a spectrum, not a fixed number; the way your crumb feels under your thumb will always tell you more about your dough’s true hydration than a scale ever could.
Beyond the Slicing Knife
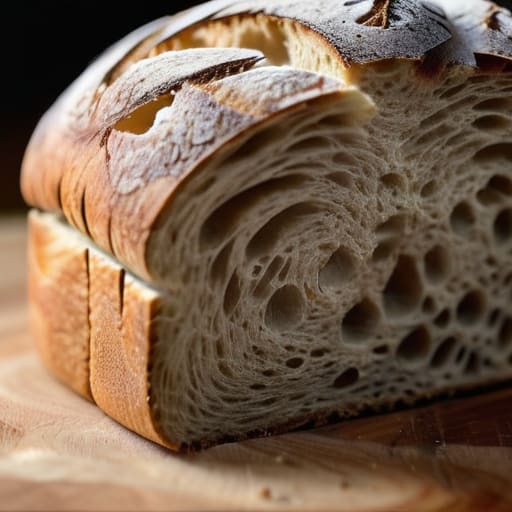
At the end of the day, reading a crumb is about connecting the dots between what you see on the plate and what you did at the bench. It is the realization that those uneven, wild alveoli weren’t a mistake, but a direct result of your hydration levels and the way you handled the dough during the folds. If you see a dense, gummy center, you know your kitchen was likely too cold or you didn’t give the fermentation the time it rightfully demanded. Don’t go looking for a new recipe or a fancy new flour; instead, look at the structure and listen to what it is telling you about your timing, your temperature, and your touch.
I spent thirty-four years staring at loaves, and I can tell you that even on my best days, the dough rarely does exactly what I tell it to do. There is a certain magic in that unpredictability, provided you have the sense to learn from it. Stop trying to bake a loaf that looks like a polished photograph in a magazine and start trying to bake a loaf that feels alive. Trust your hands, respect the clock, and remember that every “failed” crumb is just a lesson written in flour and water. Now, go get your hands messy and let the dough speak to you.
Frequently Asked Questions
If my crumb is looking tight and dense like a sponge, is it because I didn't use enough water or because I was too impatient with the bulk fermentation?
It’s likely both, but I’d bet my starter on the impatience. If your hydration is where it should be—say, 75% or higher—then water isn’t your culprit. A tight, sponge-like crumb usually means the yeast didn’t have enough time to build that airy, living structure during bulk fermentation. You rushed the dough before it was truly alive. Don’t just check the clock; feel for that bubbly, aerated tension before you shape.
How can I tell if those large, uneven holes are a sign of a well-developed dough or if I've actually over-proofed it and lost my tension?
That’s the million-dollar question, isn’t it? If those big holes are surrounded by strong, translucent walls that spring back when you touch them, you’ve hit the jackpot—that’s open crumb. But if the walls look like thin, fragile bubbles and the bread feels limp or collapses when you slice it, you’ve over-proofed. You’ve pushed the fermentation so far that the gluten structure simply gave up. It’s the difference between a lively dough and a tired one.
I've noticed my crumb feels gummy and heavy even when the hydration percentage is high—what am I doing wrong with my handling or my oven temperature?
If your crumb is gummy despite high hydration, you haven’t actually baked bread; you’ve steamed flour. You’re likely under-baking the center or rushing the oven. If your temperature is too low, the structure collapses before the starch sets. But more often, it’s the handling—you’re likely degassing the dough too aggressively during shaping, or worse, cutting into it while it’s still breathing. Let it cool completely. A warm loaf is a gummy lie.