I remember standing in my bakery at four in the morning, the air thick with the scent of yeast and the hum of the cooling oven, only to pull a tray of loaves out that felt more like doorstops than sourdough. It’s a heartbreaking feeling, isn’t it? You follow every step, you watch the videos, and yet you’re left staring at a heavy, tight crumb that won’t yield to a knife. Most people will tell you that you need a fancy new stand mixer or a more expensive brand of flour, but they’re selling you nonsense. If you are searching for how to fix dense bread, stop looking at your equipment and start looking at your environment.
I’m not going to give you a list of expensive gadgets or complicated science experiments. Instead, I’m going to tell you what I learned from thirty-four years of watching dough rise and fall. We are going to talk about temperature, timing, and touch—the three things no cookbook ever quite gets right. I’ll show you how to read your dough like a living thing so you can stop guessing and start baking. We aren’t chasing perfection here; we are just learning to respect the process.
The Quiet Failure of Yeast Activity Troubleshooting
Most people, when they see a heavy loaf, immediately go looking for a new brand of flour. They blame the grain, but more often than not, they’ve just neglected the life inside the bowl. When it comes to yeast activity troubleshooting, you have to stop thinking about ingredients as static things and start thinking about them as living creatures. If your water was even a few degrees too hot when you mixed it, you didn’t just “activate” the yeast; you scalded it. A dead or sluggish starter won’t matter how much you knead, because there’s no gas being produced to stretch those beautiful networks of gluten you’ve worked so hard to build.
It’s also about the environment. I’ve seen many a beginner make proofing time mistakes because they were looking at the clock instead of the dough. A recipe might say “let rise for one hour,” but if your kitchen is a drafty cavern, that hour is a lie. You cannot time biology with a stopwatch; you have to watch for the way the dough relaxes, how it fills the bowl, and how it feels under your fingertips. If the dough hasn’t truly woken up, it will never find the strength to expand in the heat of the oven.
Neglecting the Crucial Bread Fermentation Process
Most people think a dense loaf is a failure of ingredients, but more often, it is a failure of patience during the bread fermentation process. I’ve seen it a thousand times: someone looks at the clock, sees that an hour has passed, and decides the dough is “ready” because the recipe said so. But dough doesn’t care about your schedule. If you cut the bulk fermentation short, you aren’t just saving time; you are robbing the dough of the gases it needs to support its own weight. You end up with a tight, stubborn crumb that refuses to expand, no matter how much heat you throw at it.
It isn’t just about the time, though; it’s about understanding gluten development importance. If you haven’t built a strong enough structure through proper folding or kneading, the gases will simply leak out like a punctured tire. You might think you’re being gentle, but if the gluten hasn’t been properly stretched and strengthened, the dough lacks the structural integrity to hold those precious bubbles. When you finally slide that loaf into the oven, it won’t have the strength for a proper rise, leaving you with a heavy, compact brick instead of a light, airy boule.
The Three Hidden Culprits: Temperature, Handling, and the Lie of the Cup
- Stop using cups and start using a scale. If you’re measuring flour by the scoop, you’re guessing, and guessing leads to a heavy, tight crumb. A 70% hydration dough needs to be exactly that—70%—not “a bit more because the flour looked dry.” If you don’t weigh your ingredients to the gram, you aren’t baking; you’re gambling.
- Watch your hands, not the clock. I’ve seen many a beginner treat dough like a piece of stubborn clay, punching it and pulling it too hard. If you’re too rough during the shaping stage, you’ll knock the air out of those precious bubbles you worked so hard to build. Handle it like you’re tucking a child into bed—firm but gentle.
- Respect the thermal reality of your kitchen. If your countertop is stone and your windows are drafty, your dough isn’t going to rise on schedule just because the timer went off. A dense loaf is often just a cold loaf that never truly woke up. If the room is chilly, you have to give that dough more time to find its warmth.
- Check your salt, but check your timing too. Salt is vital for controlling fermentation, but if you’re adding it too early or in the wrong proportion, you can stall the yeast before it even gets started. However, don’t go blaming the salt if you actually just rushed the bulk fermentation because you were hungry for toast.
- Learn to feel the tension. A loaf is dense when the skin is too tight or the structure hasn’t developed enough to hold its own weight. You should feel a certain springiness when you poke the dough; if it feels like a heavy, lifeless lump, it isn’t ready to be shaped. You can’t force the strength into it; you have to let the gluten build itself.
Three Truths to Carry to Your Bench
Stop blaming the flour and start watching the room; if your kitchen is a refrigerator, your dough will be a brick, so find a warmer corner or give it the extra hour it’s begging for.
Ditch the measuring cups for a scale and stick to percentages, because a handful of flour isn’t a measurement, it’s a guess, and guesses are how you end up with a dense, heavy loaf.
Learn to feel the dough rather than staring at the clock, because a recipe can tell you when to start, but only your hands can tell you when the fermentation has actually done its job.
Listen to the Dough, Not the Clock
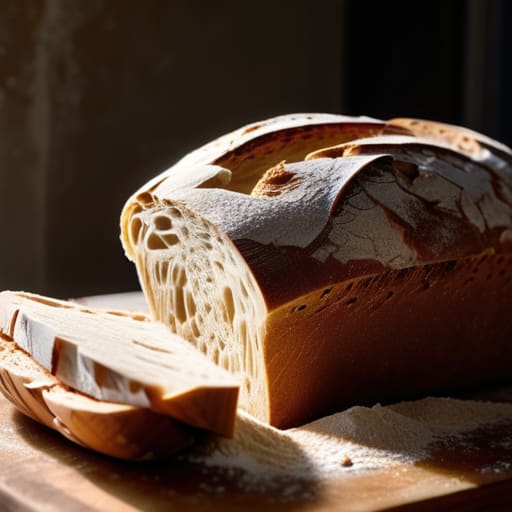
If you find yourself staring at a heavy, stubborn brick of a loaf, stop looking for a mistake in your measurements and start looking at your environment. We have talked about how yeast can sleep through a cold morning, how rushing the fermentation is essentially cheating the flour out of its life, and how a lack of strength in your hands can leave a dough gasping for air. Most dense bread isn’t a math problem; it is a temperature and timing problem. Remember that your hydration levels dictate how much room those bubbles have to grow, and if you aren’t respecting the biological rhythm of the dough, it simply won’t rise to meet your expectations.
Don’t let a heavy loaf sour your spirit. I’ve spent thirty-four years pulling trays out of the oven, and I can tell you truthfully that even the best bakers have days where the kitchen feels too cold or the hands feel too tired. A dense loaf isn’t a failure; it’s just a conversation telling you that the conditions weren’t quite right this time. Throw it in the toaster with a thick slab of salted butter, take a breath, and start again tomorrow. The flour and the water aren’t judging you—they are just waiting for you to give them the time they deserve.
Frequently Asked Questions
My dough feels perfectly elastic and looks right, but the finished loaf still comes out heavy as a brick—what am I missing?
If it feels elastic but bakes heavy, you’re likely overworking the dough during the final shape. You’ve built a strong gluten structure—that’s the elasticity you’re feeling—but you’ve tightened it so much that the gases can’t expand. It’s like trying to blow up a balloon that’s been glued shut. You need to be gentler during the final turn; let the dough breathe so it can actually rise when the heat hits it.
If I’m using a sourdough starter instead of commercial yeast, how do I know if it’s actually strong enough to lift the dough?
Don’t trust a jar that looks bubbly; trust a jar that behaves. If you want to know if your starter is ready to work, perform a simple float test. Drop a teaspoon of starter into a glass of room-temperature water. If it bobbles on the surface, it’s full of the gases needed to lift your dough. If it sinks like a stone, it’s either hungry or exhausted. Don’t force it into your flour; wait until it floats.
How much does the actual temperature of my water matter when I'm mixing the dough on a cold morning?
It matters more than you think. On a cold morning, your water isn’t just a liquid; it’s the thermal engine for your entire batch. If you use tap water straight from a cold pipe, you’re essentially putting your dough into a deep sleep before it even starts. I always aim for a final dough temperature of about 25% higher than the ambient air when the kitchen is shivering. If the water is too cold, the yeast won’t wake up, and you’ll end up with a heavy, stunted loaf.