You’ve likely been told that the secret to a perfect custard is a high-end torch or a specific brand of vanilla bean, but that’s nonsense. Most people struggle with how to make crème brûlée because they treat it like a chemistry experiment rather than a lesson in temperature control. I spent decades watching people ruin perfectly good cream by rushing the tempering process or, heaven forbid, trying to caramelize the sugar while the custard underneath was still lukewarm. If you try to torch that sugar while the custard is still warm, you’ll end up with a pathetic, sugary soup instead of a crisp, glass-like crust.
I’m not here to give you a list of fancy equipment or a recipe that looks pretty in a magazine but falls apart on the spoon. I’m going to show you how to listen to the custard and understand the rhythm of the heat. We will talk about why your ratios matter and why you must respect the chill. By the time we’re done, you won’t just be following a recipe; you’ll actually know what the custard is telling you.
Recipe Details
Ingredients
- 2 cups heavy cream
- 1 vanilla bean, split and scraped
- 5 large egg yolks
- 1/2 cup granulated sugar, plus extra for topping
- 1 pinch salt
Recipe Instructions
Step 1
First, get your heavy cream and egg yolks ready. You’ll want 500g of heavy cream (that’s about 40% fat if you’re looking at the label) and 100g of yolks—usually about five or six large ones. Don’t go using those thin, watery yolks from a carton; you need the richness that only a fresh yolk provides to carry the vanilla. Whisk the yolks with 50g of caster sugar very gently. I mean it—don’t whip them like you’re making a meringue. You aren’t looking for air; you’re just looking to marry the sugar to the fat. If you beat too much air into them, your custard will look like a bubbly sponge rather than a smooth silk.
Step 2
Warm your cream in a saucepan over medium heat. I like to add a split vanilla bean directly into the pot, but if you’re using paste, just stir it in. Watch it like a hawk. You want it to reach about 80°C, where tiny bubbles start dancing around the edges, but do not let it boil. If you boil that cream, you’ve cooked the proteins too hard and you’ll end up with a grainy mess that no amount of whisking can fix. Once it’s hot and fragrant, take it off the heat and let it sit for a minute so it isn’t scalding.
Step 3
Now comes the part where most people lose their nerve: tempering. Slowly, drop by drop at first, pour a tiny stream of the warm cream into your egg and sugar mixture while whisking constantly. If you pour it in all at once, you’ll scramble those eggs and you’ll be eating sweet omelets instead of dessert. Once you’ve tempered the eggs with a bit of the liquid, you can pour the rest of the cream in a steady, slow stream. It should feel like a smooth, heavy ribbon flowing into the bowl.
Step 4
Strain the whole mixture through a fine-mesh sieve into a jug. This is non-negotiable. Even if you think you were careful, there will be tiny bits of cooked egg or vanilla pod fragments in there. We want the custard to be impeccably smooth. Pour the liquid into your ramekins, filling them about three-quarters of the way up. If you see any large bubbles on the surface, pop them with a toothpick or a quick pass of a kitchen torch; those bubbles will turn into ugly craters in the oven.
Step 5
Set up your water bath, or bain-marie. Place your ramekins in a deep baking tray and pour boiling water into the tray until it reaches halfway up the sides of the dishes. This is how we control the heat. You aren’t baking these; you are gently poaching them in a humid environment. Slide the tray into a preheated oven at 150°C. Bake them until they have a slight wobble in the center—like jelly on a plate—but they shouldn’t be liquid. If they are completely still, they are overcooked.
Step 6
This is the hardest part for anyone who likes immediate gratification: the chill. Once they are out of the oven, let them come to room temperature on the counter before sliding them into the fridge. They need at least four hours, but I prefer overnight. If you try to caramelize the sugar while the custard is even slightly lukewarm, the heat from the torch will melt the top layer and you’ll end up with a runny, sugary soup. Patience is what makes the crack.
The Egg Yolk Ratio for Custard and a Vanilla Bean Custard Recipe
Now, let’s talk about why your custard might end up feeling like a heavy pudding rather than a silk ribbon. Most people get caught up in the brand of cream they use, but the real secret lies in the egg yolk ratio for custard. If you want that perfect creamy texture that melts the moment it hits your tongue, you cannot skimp on the yolks. I’ve seen many a novice try to use whole eggs to save a few cents, but the whites add a structural toughness that ruins the elegance. I prefer a ratio that leans heavily on the yolks—it’s that fat and lecithin that provide the stability. Think of the yolks as the soul of the dish; they carry the weight and the richness that makes the dessert feel substantial without being cloying.
When you move on to a proper vanilla bean custard recipe, don’t you dare reach for the extract. If you aren’t seeing those tiny black specks suspended in the cream, you aren’t doing it right. Those seeds aren’t just for show; they distribute the floral oils throughout the fat. Just remember, when you are tempering those yolks with the warm cream, do it slowly. If you rush the pour, you’ll end up with scrambled eggs in a fancy ramekin, and no amount of sugar will hide that mistake.
Mastering the Water Bath Baking Method for a Perfect Creamy Texture
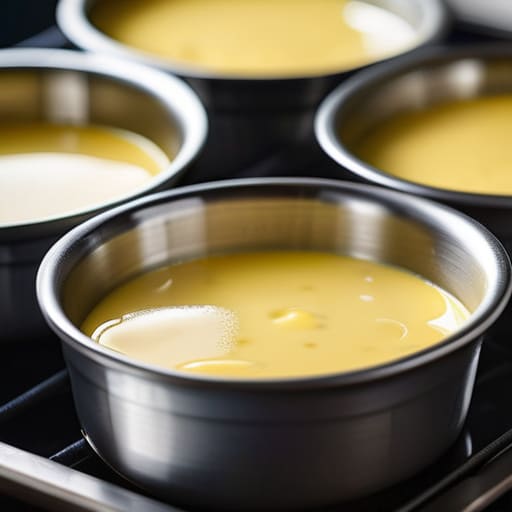
Now, let’s talk about the bain-marie, or what most of you call the water bath baking method. If you skip this, you aren’t making a custard; you’re making a baked omelet. The water isn’t just there for show; it acts as a buffer, absorbing the harsh, direct heat from your oven and distributing it gently around the ramekins. I’ve seen too many beginners try to bake these on a dry tray because they’re in a hurry, only to pull out something rubbery and full of unsightly bubbles. You want a perfect creamy texture, and that only happens when the heat moves slowly, coaxing the proteins in the egg yolks to set without seizing up.
When you pour your water into the pan, make sure it’s already hot from the tap. If you pour cold water into the tray, you’ll shock the custard and drop the temperature too low, throwing off your timing entirely. I always fill the tray until the water reaches about halfway up the sides of my ramekins. This ensures the heat is constant and even. If you see the custard starting to wobble like a jelly in the center, you’re on the right track; if it’s sloshing like a liquid, give it five more minutes. Patience is your best friend here.
The Art of Torching Sugar Topping and Essential Caramelized Sugar Crust Tip
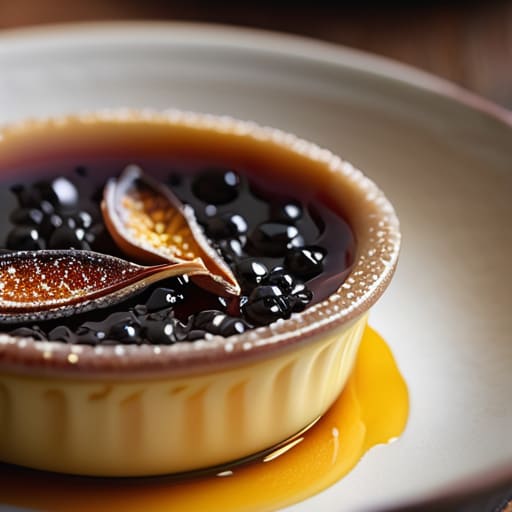
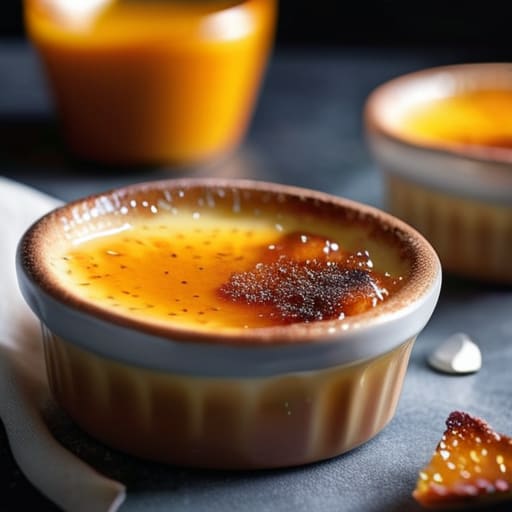
Now we come to the part that everyone loves, but it’s where most people lose their nerve. You’ve spent all that time perfecting the egg yolk ratio for custard and ensuring that water bath baking method gave you a silky, even set, so don’t go ruining it by being impatient. The biggest mistake I see is trying to torch a custard that is even slightly warm. If there is any residual heat in that vanilla bean custard recipe, your sugar won’t just caramelize; it will melt into the cream and turn your beautiful crust into a sticky, sad syrup. Chill those ramekins until they feel like they’ve come straight out of a cellar.
When you finally pick up the torch, don’t just hover in one spot. You want to move in small, circular motions, building a thin, even layer of sugar before adding another. If you pile it too thick, you’ll end up with a layer of burnt carbon that tastes like an ash tray. You are looking for a shattering, glass-like finish. A good caramelized sugar crust should be thin enough to crack with a spoon but sturdy enough to hold its own. If it starts to smoke heavily, pull back; you’re looking for deep amber, not black soot.
Five Things the Recipe Won't Tell You About Your Custard
- Watch your temperature like a hawk; if you pour that hot cream into the yolks too fast without tempering, you aren’t making custard, you’re making sweet scrambled eggs.
- Don’t skip the straining step; even if you think your custard looks smooth, passing it through a fine-mesh sieve catches those tiny bits of cooked egg that ruin the silkiness.
- Give the ramekins a good tap on the counter after you pour the custard to pop those stubborn air bubbles, otherwise, you’ll have little craters in your finished dessert.
- Patience with the chill is non-negotiable; if the custard isn’t completely cold and set through to the center, that sugar crust will just melt into a puddle of syrup.
- Use a heavy-bottomed saucepan for your cream; if you use a thin, cheap pot, you’ll get hot spots that scorch the dairy before the vanilla has even had a chance to wake up.
The Three Things to Remember When Your Custard Isn't Behaving
Trust your hands over your timer; if the custard wobbles like a jelly in the center when you nudge the ramekin, it’s not done, even if the clock says so.
Stop measuring in cups and start using a scale, because a “cup” of heavy cream can vary wildly depending on how much air you’ve beaten into it, and your custard needs precision to set.
Respect the temperature of your ingredients, because if you pour boiling cream directly into your yolks without tempering them slowly, you aren’t making dessert—you’re making sweet scrambled eggs.
The Final Spoonful
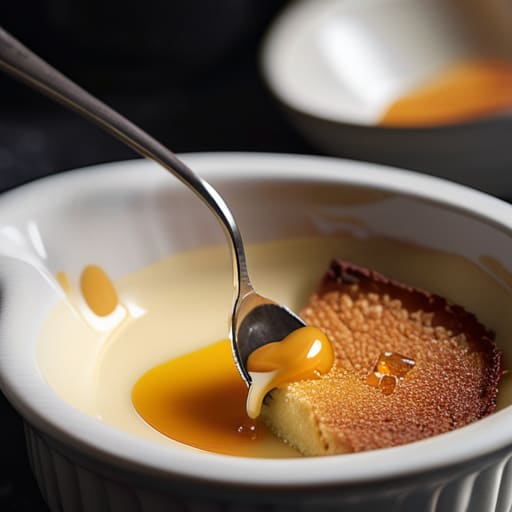
At the end of the day, a proper crème brûlée isn’t about following a list of instructions like a robot; it’s about understanding the relationship between the heat and the heavy cream. You have to respect the custard by letting it chill until it is truly set, and you must respect the sugar by not rushing that final, golden transformation. If your custard is too thin, you likely rushed the oven or ignored the water bath; if your crust is a soggy mess, you tried to serve it before the sugar had a chance to properly crystallize under the flame. Remember, it is the balance of that cold, silky center against the shattering warmth of the caramel that makes this dessert worth the effort.
Don’t let a slightly uneven crack or a stubborn yolk discourage you from trying again tomorrow. I’ve spent thirty-four years watching dough rise and sugar burn, and I can tell you that even the best bakers have moments where the kitchen doesn’t cooperate. Baking is a conversation between you and the ingredients, and sometimes the ingredients just want to talk a little louder. So, grab your torch, keep your eyes on the color of the sugar, and trust your senses more than any timer on your phone. There is nothing quite like the quiet satisfaction of that first perfect spoonful.
Frequently Asked Questions
Why did my custard turn out curdled and grainy instead of silky smooth?
You’ve likely rushed the heat or been too heavy-handed. If your custard is grainy, you’ve essentially made scrambled eggs in cream; the proteins tightened up too fast because your water bath wasn’t steady or your oven was running hot. If it looks curdled, you probably didn’t temper those yolks properly. Slow down. Pour that warm cream in like you’re coaxing a shy child, not a guest you’re trying to impress.
Can I use vanilla extract instead of a bean, or will it ruin the flavor profile?
You won’t ruin it, but you’ll lose the soul of it. A vanilla bean gives you those lovely little black specks and a depth that lingers; extract is just a bright, fleeting note. If you’re using extract, make sure it’s the real stuff—not that imitation brown water—and add it at the very end of your custard base. If you heat extract too hard, you’ll cook off the very aroma you’re paying for.
My sugar crust is soft and won't stay crunchy; what did I do wrong with the torching?
If your crust is soft, you’ve likely tried to fight the custard’s temperature. If the custard is still even slightly warm when you hit it with the flame, you aren’t caramelizing sugar; you’re just melting it into a warm syrup. Let those ramekins sit until they are stone-cold. Also, don’t be shy with the sugar—you need a thin, even layer to build height. If you rush it, you’ll end up with a soggy mess instead of a snap.