Stop looking at those glossy, golden-crusted photos on your feed and wondering why your own kitchen produces something that looks more like a heavy biscuit than a cloud. Most people think the secret to learning how to make focaccia is a fancy proofing basket or a high-end steam oven, but they are dead wrong. The truth is, a focaccia fails because you tried to force it to move faster than the yeast was ready to go, or you treated the dough like a piece of clay to be conquered rather than a living thing to be nurtured. I spent thirty years watching people rush the fermentation process, only to end up with a dense, gummy mess that no amount of rosemary or sea salt could save.
I am not going to give you a recipe that relies on “cups” or vague instructions like “let rise until doubled.” Instead, I’m going to teach you the math of a high-hydration dough—we’re looking at about 80% hydration here—and more importantly, I’ll teach you how to read the bubbles. I will show you how to feel the tension in the dough and how to respect the temperature of your countertop, because if you understand the rhythm of the rise, you will never struggle with a flat loaf again.
Recipe Details
Ingredients
- 500g bread flour
- 400ml warm water
- 10g sea salt
- 7g instant yeast
- 3 tablespoons extra virgin olive oil
- 2 sprigs fresh rosemary
- 1 teaspoon flaky sea salt
Recipe Instructions
Step 1
First, we need to get your ingredients together. I use a 80% hydration dough for my focaccia because it gives you those big, airy bubbles that make the bread worth eating. You’ll need 500g of strong bread flour (100%), 400g of lukewarm water (80%), 10g of fine sea salt (2%), and 7g of instant dried yeast (1.4%). Don’t go hunting for measuring cups; if you want this to work, you have to use a scale.
Step 2
Mix your flour, yeast, and water in a large bowl until no dry streaks remain. It’s going to look like a shaggy, unappealing mess at first, but don’t you dare add more flour. Add your salt last, sprinkling it over the top, and then squeeze it into the dough with your hands until it’s incorporated. Let it rest in a covered bowl for about 30 minutes; this is called an autolyse, and it lets the flour fully hydrate so you aren’t fighting the dough later.
Step 3
Now we begin the strength building. Instead of heavy-handed kneading—which is a waste of your energy and bad for the gluten—we are going to do “stretch and folds.” Every 30 minutes, wet your hand, grab one side of the dough, pull it up high, and fold it over into the center. Rotate the bowl and do this four times. Do this for a total of four sets over two hours. You’ll feel the dough change from a sticky puddle into something supple and elastic.
Step 4
Once your folds are done, the dough needs to go into a large, well-oiled rectangular pan for its bulk fermentation. I use plenty of olive oil—don’t be stingy here, the oil is what fries the bottom of the bread into that golden crust. Cover it and let it sit in a warm spot until it has nearly doubled in size. If your kitchen is drafty, put it in the oven with just the light turned on; it’s a gentle warmth that the yeast loves.
Step 5
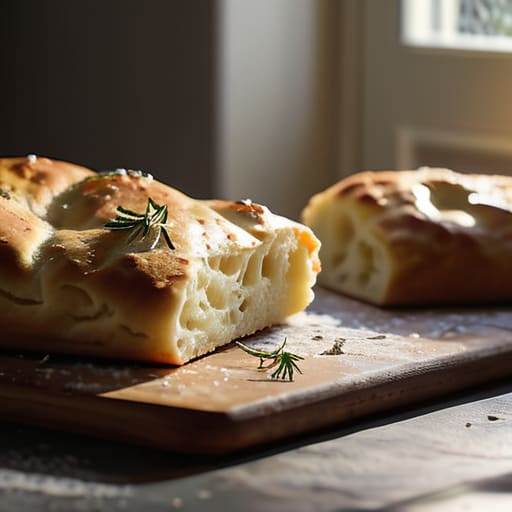
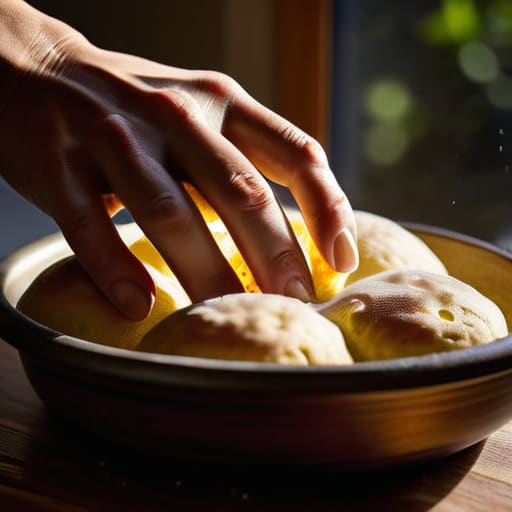
This is the part where people usually rush, and it’s where they fail. Once the dough is puffy, dimple it. Pour more oil over the top, then use your fingertips to press straight down into the dough, creating those deep wells. This creates little reservoirs for the oil and salt to pool in. Sprinkle with flaky sea salt and perhaps some rosemary, then let it rest for another 45 minutes. You want the dough to look tense and bubbly before it ever touches the heat.
Step 6
Finally, preheat your oven to 220°C (about 425°F). You want it hot so the steam can hit that dough immediately and give you a good spring. Slide the pan in and bake for about 20 to 25 minutes. You aren’t looking for a specific color, you’re looking for a deep, golden-brown crunch on the edges and a bottom that sounds hollow when you tap it. Let it cool in the pan for a few minutes, then move it to a rack so the bottom doesn’t get soggy from its own steam.
Mastering the High Hydration Dough Technique Through Touch
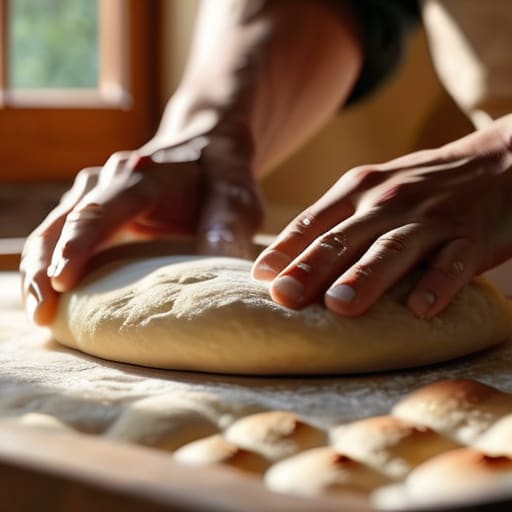
Now, don’t let that sticky mess frighten you. When you’re working with a high hydration dough technique like this, your hands are more important than any stand mixer you’ll ever buy. You aren’t looking for a smooth, elastic ball of dough like you would for a sandwich loaf; you’re looking for strength through structure. Instead of vigorous kneading, which can bruise a delicate dough, I want you to use gentle folds. Every thirty minutes or so, reach under the dough, pull it up, and fold it over itself. This builds tension without knocking the air out of the bubbles. If the dough feels like it’s fighting you, it’s likely because it’s too warm or you’re being too impatient with the gluten development.
Once you’ve mastered the feel, the magic happens in the dimples. When you transfer it to your prepared tin, don’t just poke it; press into it with intention. I love a heavy hand with the rosemary infused olive oil—it should pool slightly in those little craters. That oil, combined with a generous sprinkle of flaky sea salt topping, creates those crispy, fried-bread edges that make a focaccia truly sing. If your dough doesn’t spring back immediately when you touch it, it hasn’t finished its rise. Trust the dough, not the clock.
The Yeast Fermentation Process Respecting the Gift of Time
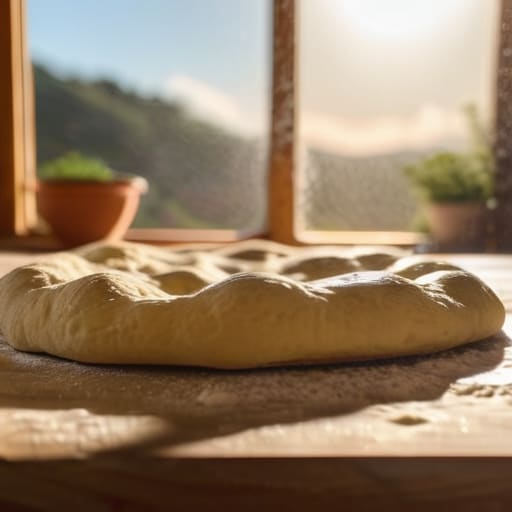
The yeast fermentation process isn’t a countdown timer you can set and forget; it’s a conversation between the microbes and your kitchen environment. When I was running the shop, I learned early on that the yeast doesn’t care what your recipe says—it only cares about the temperature of the room and the food you’ve provided. If you are using a no knead focaccia method, you are essentially leaning on time to do the heavy lifting that your hands won’t. This is where the magic happens. You might see bubbles starting to form on the surface, and that is the yeast telling you it’s happy. If the dough feels sluggish or heavy, don’t panic and don’t add more yeast; just find a warmer corner and give it the patience it deserves.
I’ve seen many beginners try to rush this by cranking up the heat, but all that does is create a hollow, yeasty-tasting loaf. Instead, aim for a slow, steady rise. This develops the complex, slightly tangy flavor profile that makes a truly great bread. Once you’ve mastered that rhythm, you can start playing with aromatics, like a generous drizzle of rosemary infused olive oil, to marry those fermented notes with something bright and herbal.
Five Things the Photos Won't Tell You
- Stop looking at the clock and start looking at the bubbles. If your recipe says “rise for two hours” but your kitchen is drafty and the dough hasn’t even doubled, you wait. You don’t move to the next step until the dough looks alive, not because the timer went off, but because the fermentation says it’s ready.
- Treat your oil like a structural ingredient, not a garnish. I use a 75% hydration dough, but I want enough olive oil in that pan to practically fry the bottom of the loaf. That oil is what creates the crust that shatters when you bite it; if you’re being stingy with the oil, you’re being stingy with the soul of the bread.
- Respect the dimpling. When you go to press your fingers into that dough, do it gently at first. You aren’t punching it; you’re coaxing it. If the dough fights you and springs right back, it’s either too cold or you’ve been too rough with it during the folding stage. Let it relax for ten minutes and try again.
- Salt is a seasoning, but it’s also a regulator. Use a good sea salt, and don’t be afraid of it. A focaccia that tastes like nothing is just a sponge. I always tell people to sprinkle a bit of coarse salt right into those dimples after the oil goes in—it creates these little pockets of intense flavor that make the whole thing sing.
- Your oven needs to be a furnace. Most home ovens struggle to hold a steady heat, so preheat it longer than you think you need to. You want that initial hit of heat to turn the moisture in the dough into steam instantly. That’s the only way you’ll get those big, beautiful air pockets instead of a dense, heavy slab.
Lessons from the Flour-Dusted Bench
Trust your hands over your eyes; a high-hydration dough like this will look like a sticky, unmanageable mess at first, but if you feel that silky, elastic tension developing through your fingertips, you’re exactly where you need to be.
Stop looking at the clock and start looking at the dough; if your kitchen is drafty and the rise is sluggish, let it sit another hour—the yeast doesn’t care about your dinner schedule, and neither should you.
Ditch the measuring cups for a scale; if you aren’t working with weights and percentages, you aren’t baking, you’re just guessing, and guessing is why people end up with heavy, dense bricks instead of airy crumb.
The Baker's Last Word
At the end of the day, a good focaccia isn’t about following a list of instructions like you’re assembling flat-pack furniture. It’s about understanding that your 80% hydration dough is a living, breathing thing that responds to the air in your kitchen and the pressure of your palms. Remember that if the dough feels tight or stubborn, it’s likely just asking for more time to relax, not telling you that you’ve failed. Keep your weights precise, watch your temperatures, and never—under any circumstances—try to hurry the fermentation just because you’re hungry. If you respect the relationship between the salt, the water, and the heat, the bread will eventually respect you back.
I spent thirty-four years watching people walk into my shop looking for perfection, but the best loaves I ever pulled from the oven were often the ones that looked a little bit messy or uneven. Don’t let the fear of a sticky countertop stop you from getting your hands deep into that dough; that is where the real magic happens. Once you stop looking at the clock and start listening to the dough, you’ll realize that baking isn’t a chore to be finished, but a conversation to be had. Now, go grab some olive oil, get a little flour on your apron, and just enjoy the process.
Frequently Asked Questions
My kitchen is freezing today; how much longer should I let the dough sit if it isn't moving?
Don’t panic and certainly don’t add more yeast; that’s just a recipe for a sour, yeasty mess. If your kitchen is freezing, the yeast has simply gone to sleep. You aren’t looking for a clock to tell you when it’s done, you’re looking for the dough to double in volume and feel airy. Move it to a turned-off oven with the light on, or a spot near the radiator. Just give it time to wake up.
The dough feels incredibly sticky and messy under my hands—am I doing something wrong, or is it supposed to be this temperamental?
Oh, darling, don’t you dare panic. If you’re working with a high-hydration dough—and we’re talking 80% here—it’s supposed to be a bit of a mess. It’s not “sticky” because you’ve failed; it’s just liquid-heavy and alive. Stop trying to fight it with extra flour; that’s how you turn a beautiful, airy crumb into a heavy brick. Use wet hands, use gentle folds, and trust the gluten to find its own strength.
I used a different brand of flour than the recipe called for; will that change how much water I actually need to add?
Oh, absolutely. Flour isn’t just “flour”—it’s a living thing, and every brand handles water differently. Some are thirstier than others depending on how much protein they’ve kept in the mill. If your new brand feels stiff or shaggy, don’t just stare at the recipe; add a splash more water. If it’s slack and weeping, hold back. Trust your hands, not the printed number. Aim for that 80% hydration feel, regardless of what the bag says.