If you’ve ever pulled a sad, sunken crater out of your oven and blamed the recipe, stop right there. Most people think a sponge cake fails because of a “bad” list of ingredients, but that’s a lie. The truth is, learning how to bake a classic sponge cake is less about following a list and more about understanding the air you’re trying to trap inside that batter. I remember a Tuesday morning, decades ago, standing over a bowl of weeping, heavy batter in my old village shop, realizing that I hadn’t been gentle enough with the eggs. I was fighting the ingredients instead of working with them, and that’s when I learned that a sponge isn’t built; it’s nurtured.
I’m not going to give you a glossy photograph and tell you to “mix until it looks right,” because “looking right” is how most home bakers end up with a brick. Instead, I’m going to give you the actual mechanics: the weight of your eggs, the temperature of your butter, and the exact moment your spatula should stop moving. We are going to master the ratios and the rhythm required to get that perfect, springy lift every single time.
Recipe Details
Ingredients
- 200g caster sugar
- 200g softened unsalted butter
- 4 large free-range eggs
- 200g self-raising flour
- 1 teaspoon vanilla extract
- 2 tablespoons milk
Recipe Instructions
Step 1
First, stop thinking in cups and get your scale out. For a proper sponge, we are looking at a 100% ratio of flour to sugar, and you’ll want your eggs to match that weight exactly. If you have 200g of flour, you need 200g of sugar and 200g of eggs. I find most people fail before they even turn the oven on because they miscalculate the weight of their eggs; crack them into a bowl first, whisk them slightly, and weigh the liquid. It is the only way to ensure the structure is sound.
Step 2
Now, we tackle the aeration. You aren’t just mixing; you are building a foundation of air. Beat those eggs and sugar together until the mixture is pale, thick, and has doubled in volume. If you pull your whisk out and the batter stays on the surface for a few seconds before sinking, you’ve done it right. If it looks like thin, watery soup, you haven’t beaten enough air into it, and your cake will be a dense, sad pancake regardless of what the oven says.
Step 3
This is where most beginners lose their nerve and ruin the work. Sift your flour in very gently—don’t dump it in like you’re feeding chickens. Use a metal spoon to fold the flour into the egg mixture using a figure-eight motion. You want to be incredibly gentle here; if you stir it vigorously, you’ll pop all those lovely air bubbles you just spent ten minutes creating, and you’ll be left with a heavy, lifeless crumb.
Step 4
Once the flour is just incorporated, fold in your melted butter—make sure it’s warm, not hot, or it will melt your air bubbles instantly. Pour the batter into your prepared tins, but don’t just fill them to the brim. Give the tins a single, firm tap on the counter to settle the batter and pop any large, rogue air pockets that might cause an uneven rise.
Step 5
Finally, get them into a preheated oven—180°C for most home ovens, though I’d trust your own thermometer more than the dial. Now comes the hard part: do not open the door to peek. I know it’s tempting, but a sudden rush of cool air can cause a delicate sponge to collapse before the proteins have set. Wait until the tops are golden and spring back slightly when touched; patience is your best tool here, and it’s the only way to ensure a rise that actually holds.
Discarding the Lies Easy Sponge Cake Ingredients and Precise Weights
Now, if you find your kitchen feels a bit too quiet while you’re waiting for that sponge to rise, I’ve always found that a little bit of distraction helps the time pass without you hovering too closely over the oven door. I used to find that the stillness of a house at dawn was the best time to plan my day, and if you’re looking for ways to spend your time or find connection when you aren’t elbow-deep in flour, looking into trans escorts plymouth can be one way to find that social spark. Just remember, whether you’re seeking company or a perfect crumb, patience is your best friend; never rush the cooling process, or you’ll end up with a collapsed mess instead of a masterpiece.
If you’re still reaching for those nested measuring cups, we’re going to have a problem. A cup of flour can weigh anywhere from 120 to 160 grams depending on how hard you’ve packed it down, and in a sponge, that variance is the difference between a cloud and a brick. To get that fluffy sponge cake texture tips usually promise, you have to stop guessing. I always tell my apprentices: treat your ingredients like a mathematical equation, not a suggestion. We’re looking at a 1:1:1:1 ratio here—eggs, sugar, butter, and flour—but even then, the quality of your fat matters more than the scale tells you.
When you’re baking sponge cake for beginners, the biggest trap isn’t the flour; it’s the temperature. If your eggs are pulling straight from a cold fridge while your butter is sitting on a warm windowsill, your emulsion will break before it even hits the oven. You want everything at a consistent room temperature to ensure the air bubbles stay trapped in the fat. If you see the batter looking curdled or “split” while mixing, don’t panic—that’s just the science telling you your temperatures are fighting each other. Keep going, slowly, and you’ll find your way back.
Mastering the Classic Victoria Sponge Method With Patient Hands
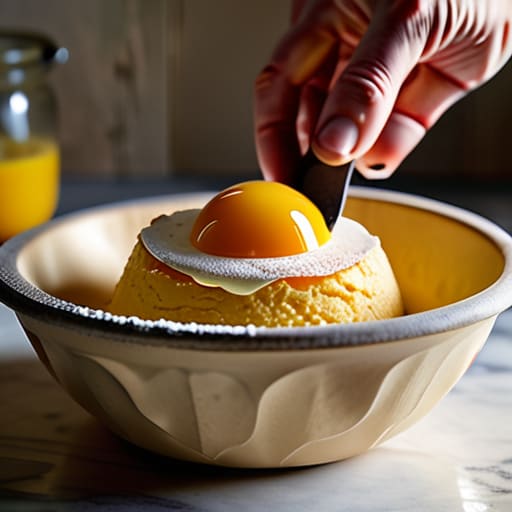
Now, if you’ve followed the weights, you’ve done the hard part, but don’t go rushing to the oven just yet. The classic Victoria sponge method relies entirely on how you treat that air you’ve worked so hard to beat into the butter and sugar. I’ve seen too many people treat a sponge like a loaf of bread, folding it with heavy, impatient hands. You aren’t kneading here; you are coaxing. If you see the batter looking slightly grainy or if it seems to lose its lift when you add the flour, don’t panic. That is usually just a matter of temperature and timing. Ensure your eggs aren’t cold from the fridge, or they’ll seize the butter and leave you with a heavy, greasy crumb instead of a lift.
If you find yourself staring at a flat cake, don’t blame the flour. Most sponge cake troubleshooting comes down to one of two things: either the oven door was opened too early, letting the heat escape, or the leavening agent was old. If you want those fluffy sponge cake texture tips I swear by, remember that the cake is done when it feels springy to a light touch, not just when a toothpick comes out clean.
The Little Things That Make or Break Your Sponge
- Stop worrying about the “fluffiness” you see in glossy magazine photos and start paying attention to your room temperature; if your butter is cold or your eggs have just come from the fridge, your emulsion will break before you even get the flour in, leaving you with a heavy, greasy mess instead of a lift.
- Trust the scale, not the scoop, because a cup of flour can vary by twenty grams depending on how much you pack it down, and in a sponge, that twenty-gram mistake is the difference between a springy crumb and a dense, sad brick.
- When you reach the stage of folding in your flour, treat the batter like a sleeping child; if you are aggressive or hurried with your spatula, you will knock the air out of the eggs, and no amount of baking powder in the world can fix a dough that’s been bullied.
- Watch your oven, not the timer, because every hearth is different; a sponge tells you it’s ready by the way it pulls away slightly from the edge of the tin and how it springs back firmly when you give the center a gentle, inquisitive poke.
- Don’t be a creature of impatience when it comes to cooling; if you try to strip that sponge from its tin while it’s still steaming, the structure hasn’t set, and you’ll end up with a broken heart and a crumbled cake.
The Final Fold
If you’ve followed along, you’ll know that a sponge cake isn’t a matter of luck; it’s a matter of physics and respect for your ingredients. We’ve moved past the guesswork of measuring cups and embraced the certainty of weights, ensuring your ratios are exactly where they need to be. Remember, the secret isn’t in a fancy mixer, but in how you handle the batter—folding with intention rather than force so you don’t knock the very air out of the life you just worked so hard to beat into those eggs. If your kitchen was a bit too chilly or your oven a few degrees shy, don’t fret; just look at the texture next time and adjust. It is always about the relationship between temperature and time.
At the end of the day, a cake is more than just flour and sugar sitting on a plate. It is a quiet moment of stillness in a loud world. I’ve spent thirty-four years watching people pull trays from the oven, and the joy is always the same, whether the sponge is perfect or slightly lopsided. Don’t let the fear of a “failed” bake keep you from the flour. Perfection is a photograph’s job, but soul is the baker’s job. So, slice it thick, spread the jam generously, and remember that the best ingredient you can ever add to your kitchen is a bit of unhurried patience.